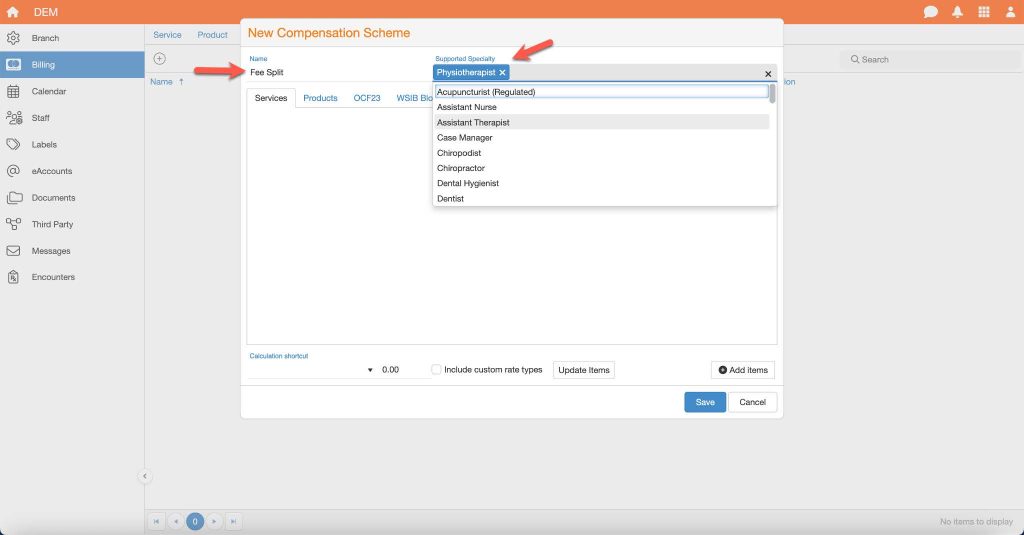
1. Setting Up a Provider Compensation Scheme
- Navigate to Compensation Settings
- Go to Branch > Billing > Compensation Scheme tab.
- Click the
 icon to create a new compensation scheme.
- Configure the Scheme
- Enter a Name for the scheme.
- Select the Supported Specialties.
Services Tab
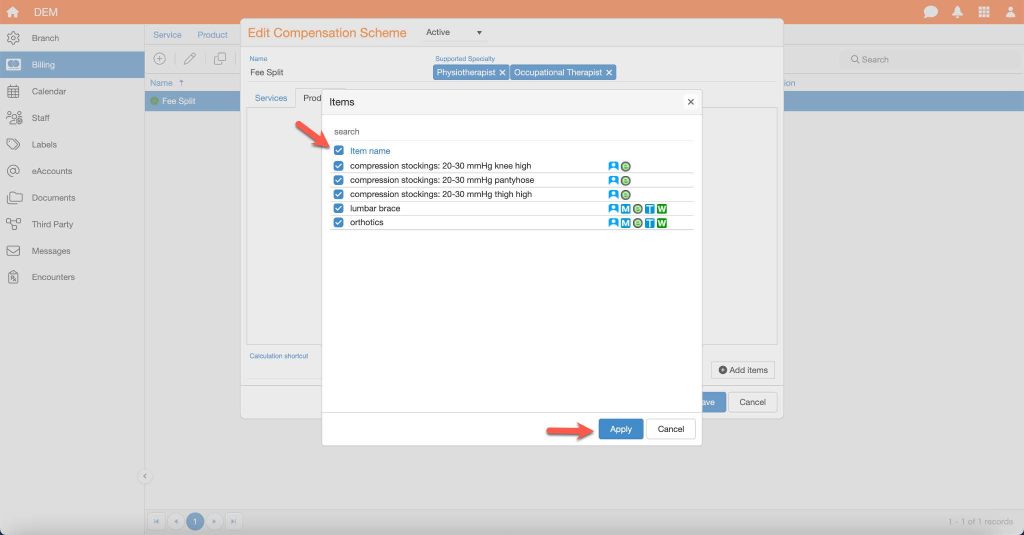
1. Click the ![]() Add Items button to open the selection menu.
Add Items button to open the selection menu.

2. After selecting all desired items, click Apply to add them to the compensation scheme.

Assign Compensation Types
- For each service, assign a rate:
- Commission
- Hourly
- Fixed

- Custom: Configure specific rates for coverage types (e.g., EHC, AB, AB Catastrophic, Tort, Non-Insured, WSIB).

- Use Calculation Shortcuts to apply rates in bulk:
- Apply to all commissions, fixed rates, hourly rates, or custom items.
- Click Update Items to save changes.

Products Tab
- Select Products
- Click the
 Add Items button to open the selection menu.
- Click the
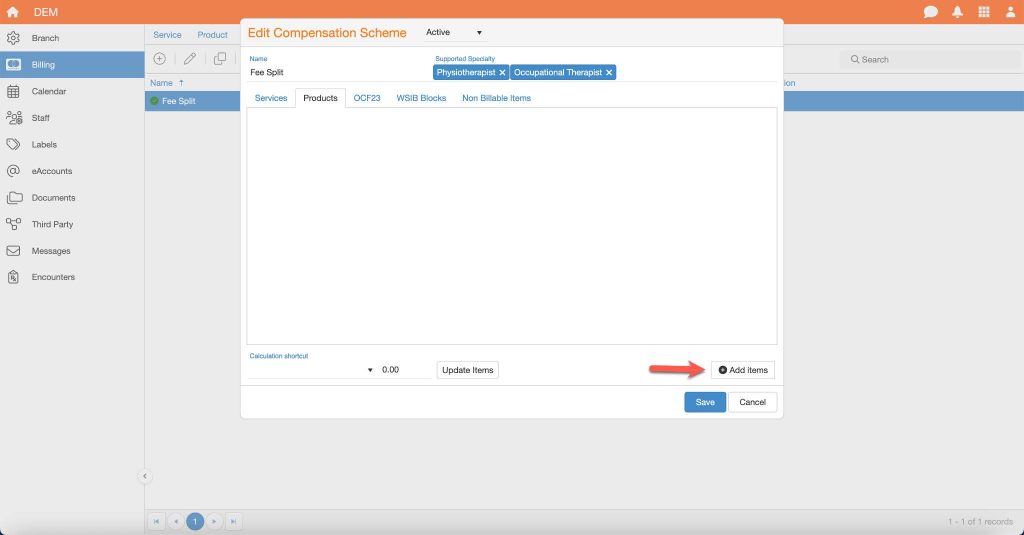
- Choose the reimbursable products and click Apply.
- Assign Compensation Type
- For each product, choose either Commission or Fixed Rate and specify the corresponding amount.
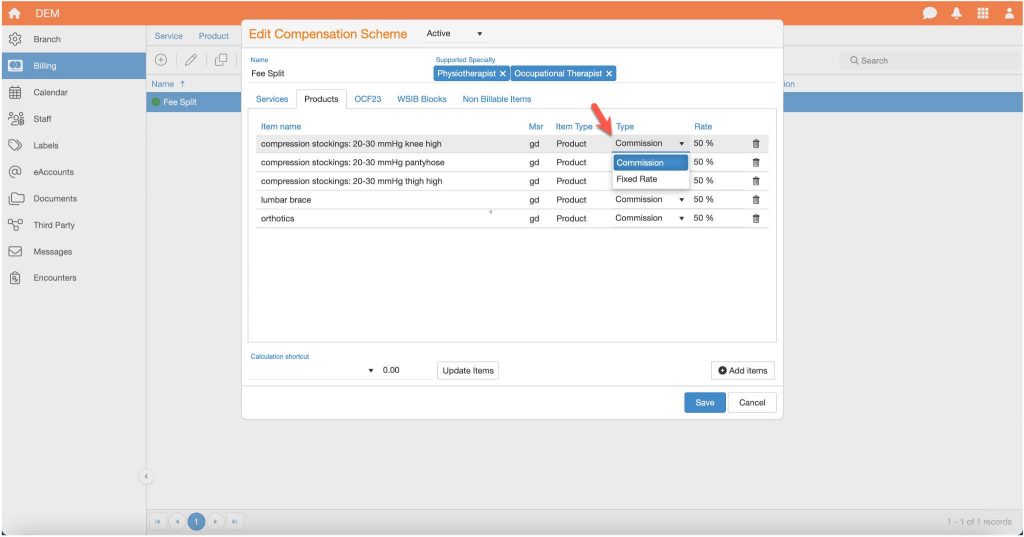
- Use calculation shortcuts to apply rates in bulk and click Update Items.

OCF-23 Blocks
- Choose to set compensation for either the block total or individual items.
- If Fixed or Commission is selected, the compensation applies only to the primary provider’s transactions.
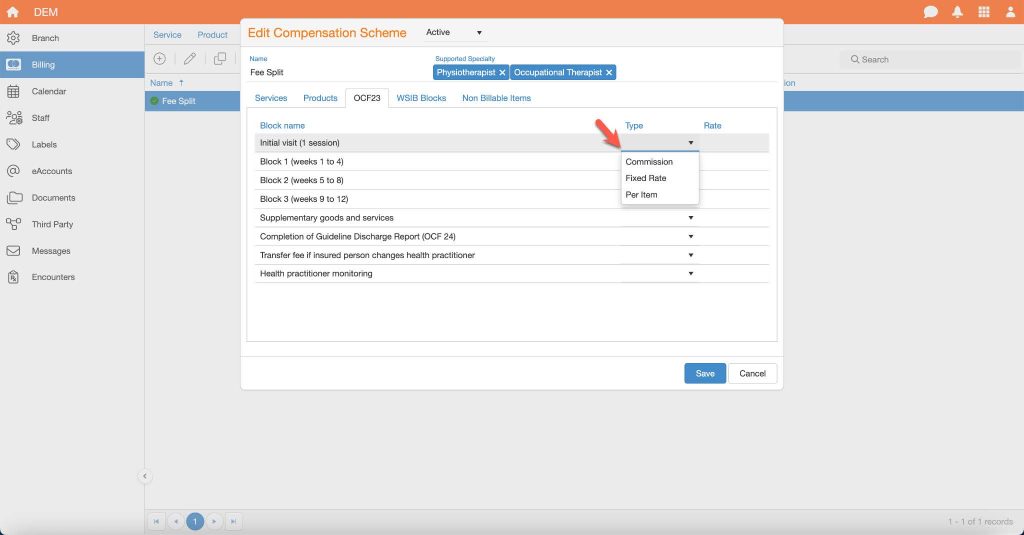
- For multiple providers:
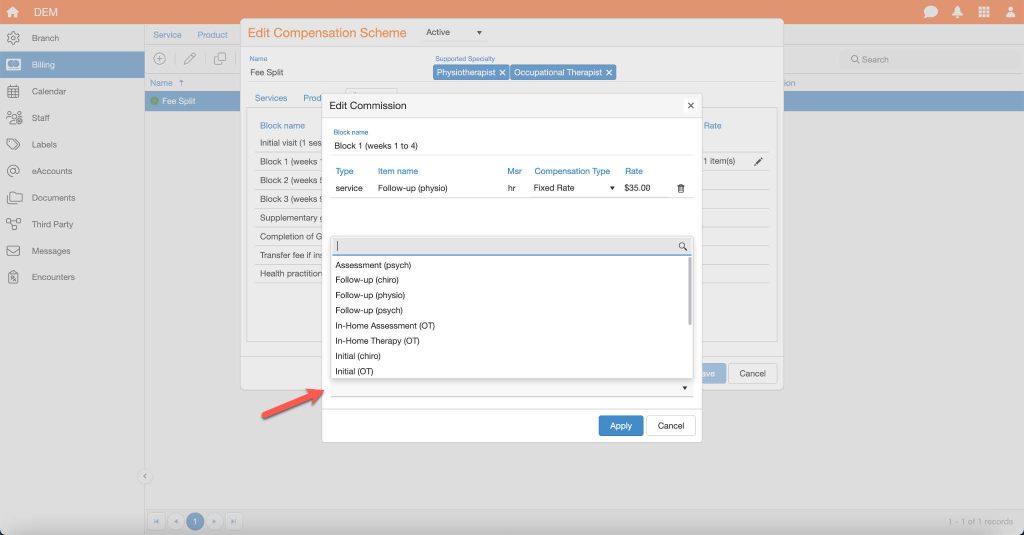
- Select Per Item under the type, then edit each block item:
- Specify services/items provided in the block.
- Assign the compensation type (Commission, Hourly, or Fixed Rate) and amounts and click Apply.
- Select Per Item under the type, then edit each block item:
WSIB Blocks
- Select the WSIB Program of Care and expand the selection.
- Under type, choose Commission, Fixed, or Per Item for each block item.
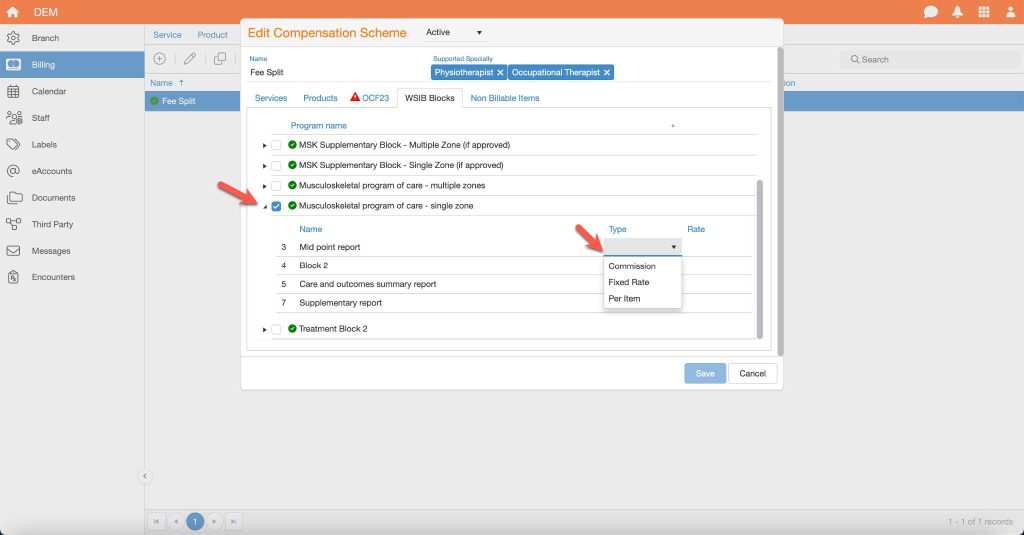
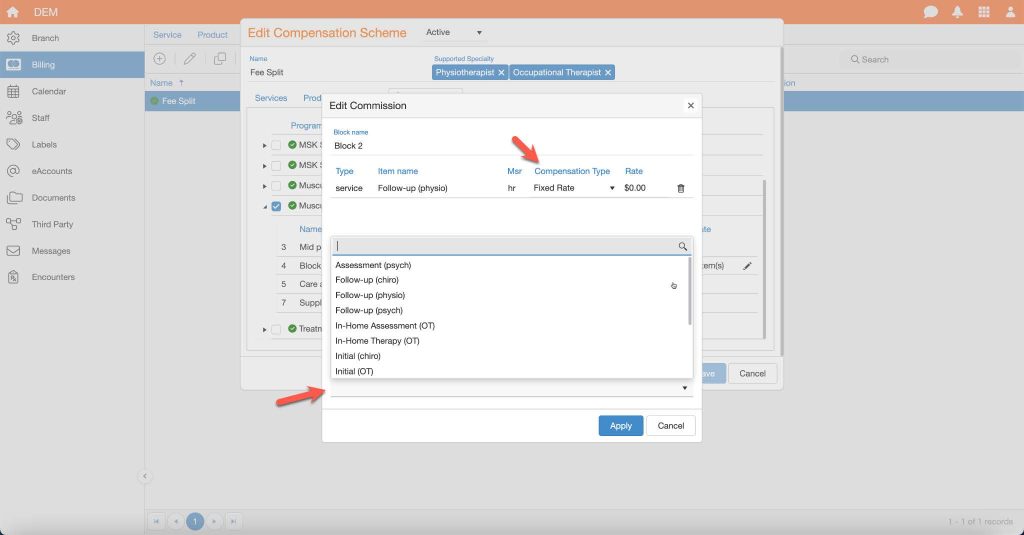
- For multiple providers:
- Select Per Item, then edit each block item:
- Assign compensation types and amounts for individual services/items.
- Select Per Item, then edit each block item:
2. Applying Compensation Schemes to Providers
- Navigate to the Provider’s Compensation Settings
- Go to Branch > Staff.
- Select the provider and click the transactions icon
 in the top-left corner.

- Navigate to the Compensation Scheme tab.

- Click the icon to create a new scheme.
- Fill in the required details:
- Start Date
- Specialty
- Compensation Scheme Name
- Add any notes or memos as needed.
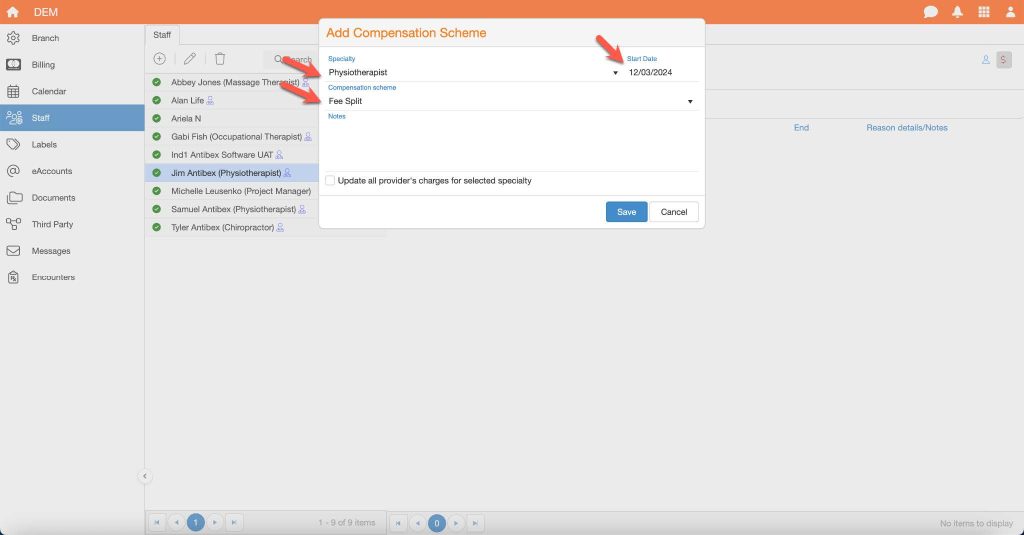
- Optional: Update Provider Charges
- To recalculate compensation for charges from the past 90 days (based on the start date), select the checkbox labeled Update all provider’s charges for the selected specialty.

3. Managing Compensation Schemes
View or Edit a Scheme
- Double-click on the applied scheme or click Edit
 .
. - Update the scheme or add notes as needed.

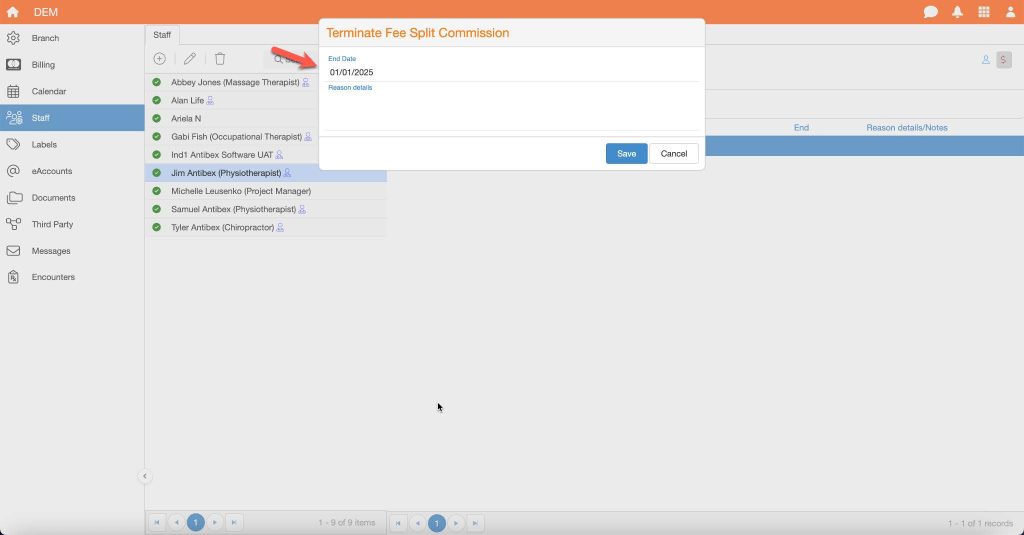
Terminate a Scheme
- Right-click on the scheme and select Terminate.
- Enter an End Date and optional reason.
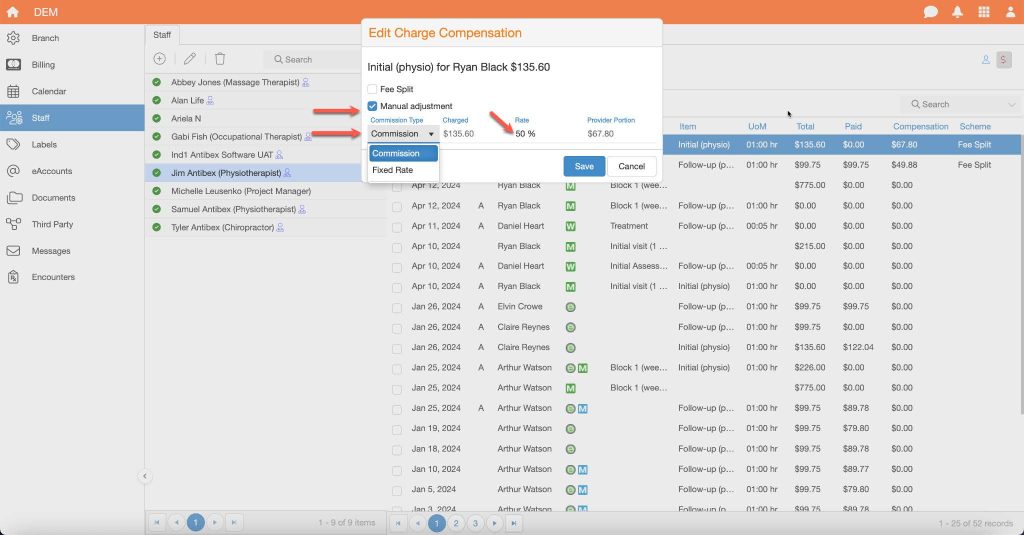
4. Manual Adjustments
- Adjust a Specific Charge
- In the Transactions screen, double-click the charge or click Edit .
- Check the Manual Adjustment box and enter the custom compensation rate.
- In the Transactions screen, double-click the charge or click Edit
5. Printing Transactions and Compensation
- Click the Printer Icon
 in the Transactions screen.
 - Select the Start and End Dates for the desired period.
- Use the Overdue Status Filter to refine your results:
- All: Includes all transactions within the selected date range.
- Fully Paid: Displays only transactions that are fully paid within the selected date range.
- Overdue: Shows outstanding transactions within the selected date range.
- Click Print to generate a summary of transactions and applied compensation rates.