This guide will show you how to efficiently add and manage checkboxes, text boxes, and scales within your EMR encounter templates. By using these tools, you can streamline the process of completing encounter notes, reducing the time spent on typing and allowing you to focus more on patient care.
Overview of Encounter Note Options
Steps to Add and Manage Encounter Forms
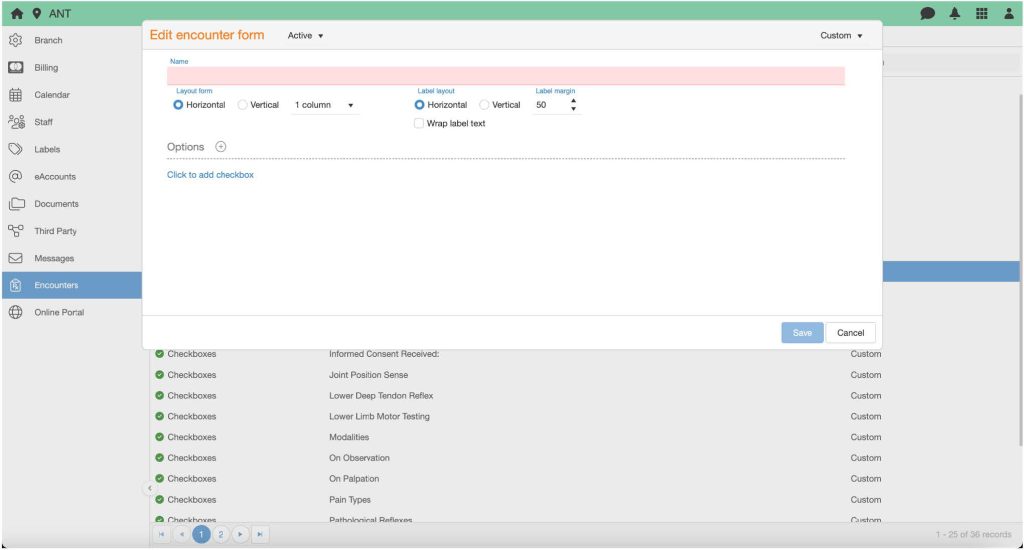
1. Accessing Encounter Forms Settings
- Navigate to:
Settings > EMR > Encounter Forms - Click on the
 to create a new encounter form.
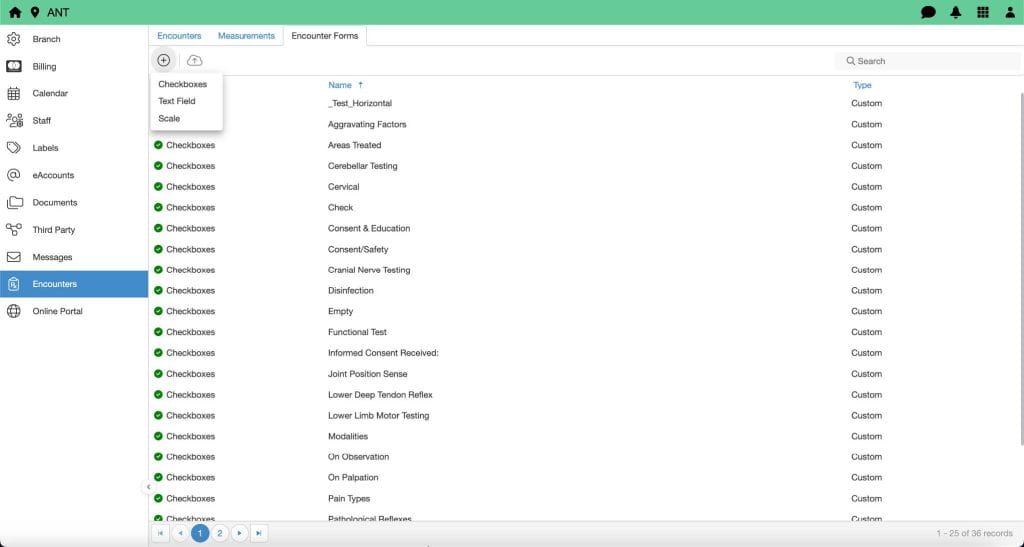
2. Adding and Managing Checkboxes
- Create a New Checkbox List
- Click on the button and select Checkboxes.
- Give the options list a Title (e.g., “Symptoms”, “Medications”).
- Click on the
- Choose Layout Options
- Label Layout: Choose Vertical or Horizontal.
- Horizontal Layout: The label text will appear beside the option. Adjust the label margin and choose to wrap long label text.
- Vertical Layout: The label text will appear above the option.
- Number of Columns: Specify the number of columns for horizontal or vertical alignment.
- Label Layout: Choose Vertical or Horizontal.

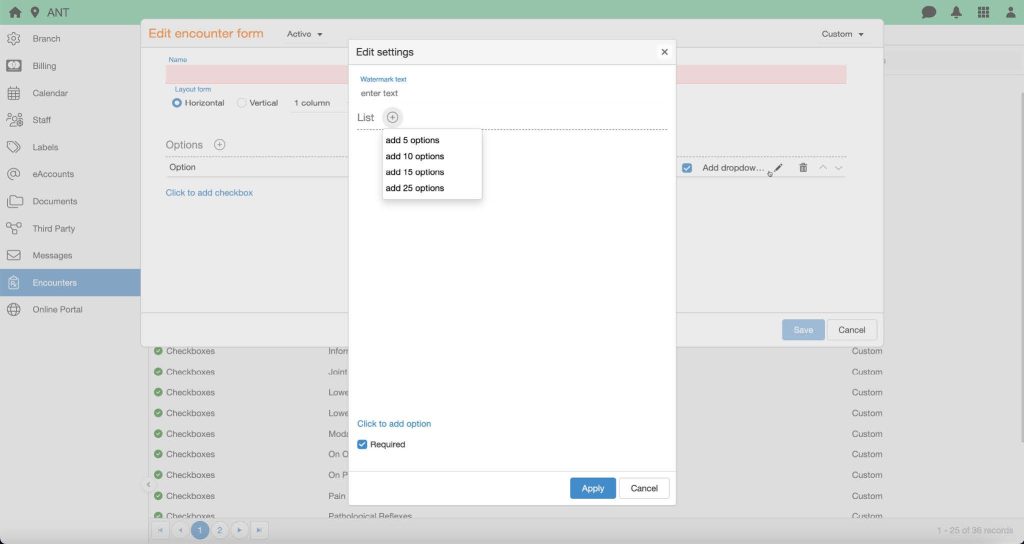
- Add Options
- Click “Click to add option” to add a single option.
- To add multiple options, select the next to the “Options Header” and choose the number of options (5, 10, 15, 20, 25, 30, 40, or 50).
- Click on the new option line’s watermark (e.g., “Option”) to rename the label as needed.

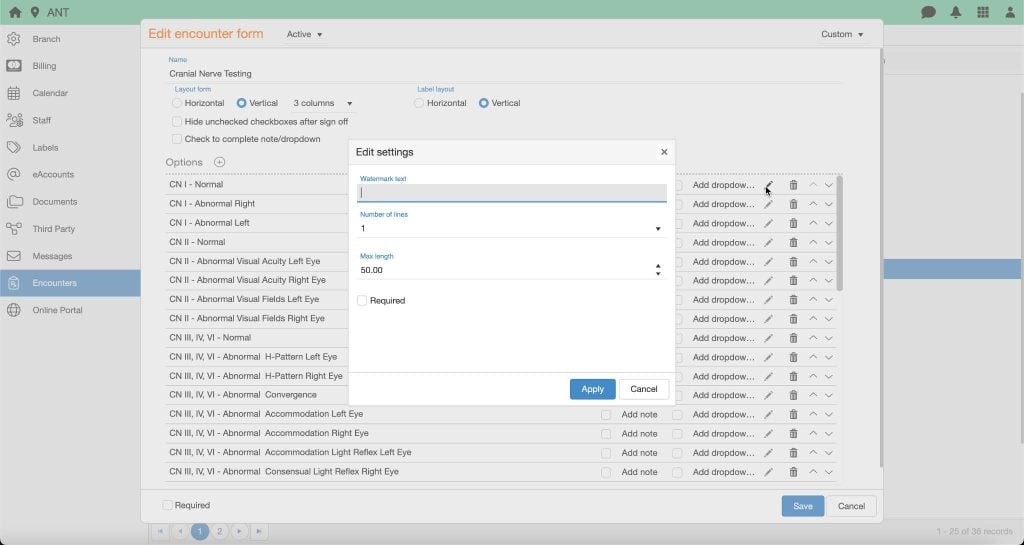
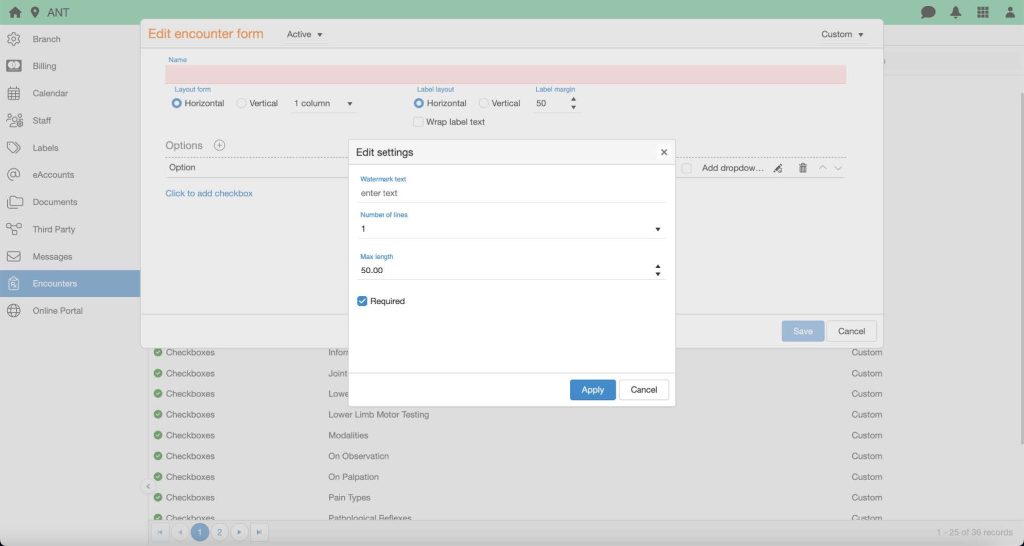
- Add Notes or Dropdown Lists to Each Option
- For Notes:
- Check the Add Note box, then click Edit
 to customize the note settings.
 - Set a Watermark Text (e.g., “Please specify”).
- Define the number of Vertical Lines for the note and set a Max Character Length.
- Decide if the option is Required.
- Check the Add Note box, then click Edit
- For Notes:
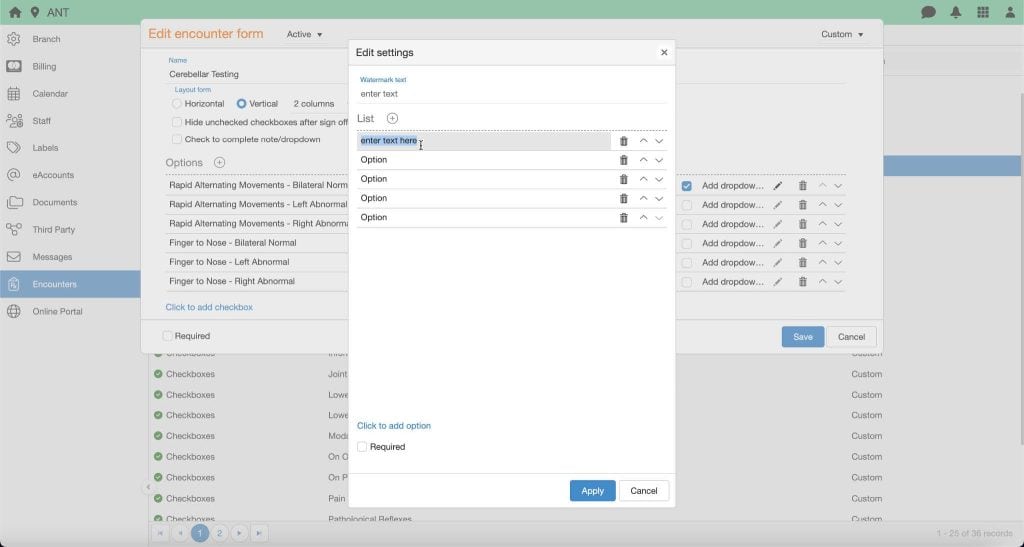
- For Dropdowns:
- Check the Dropdown box and click Edit .
- Set a Watermark Text (e.g., “Select an option”).
- Add options by clicking “Click to add option” and renaming them.
- Choose whether the field is Required.
- Check the Dropdown box and click Edit
- Optional Settings
- Enable “Hide Unchecked Checkboxes After Sign-Off” to remove unselected options after the encounter is signed off.
3. Adding and Managing Text Fields (Text Boxes)
Here’s how to manage them:
- Create a New Text Field
- Click on the button and select Text Field.
- Assign a Title (e.g., “Patient Comments”).
- Click on the
- Choose Layout Options
- Label Layout: Choose between Vertical or Horizontal.
- Label Margin: For horizontal layouts, adjust the margin between the label and the option.
- Wrap Long Labels: Opt to wrap label text for easier readability.
- Add Options
- Click “Click to add option” to add a new option.
- To add multiple options, select the button next to the “Options Header” and choose the desired number (5, 10, 15, 20, 25, 30, 40, or 50).
- Rename each option as needed.

- Add Notes or Dropdowns
- For Notes:
- Enable the Add Note option and click Edit to customize the note (e.g., watermark text, vertical lines, character limit).
- Choose whether the field is Required.
- Enable the Add Note option and click Edit
- For Notes:
- For Dropdowns:
- Enable Dropdown and click Edit to customize options.
- Add options and set the Required checkbox if needed.
- Enable Dropdown and click Edit

4. Adding and Managing Scales
- Create a New Scale
- Click on the button and select Scale.
- Provide a Title (e.g., “Pain Scale”, “Mood Rating”).
- Click on the
- Choose Layout Options
- Select either Vertical or Horizontal for the label layout.
- Set the number of columns
- Add Options
- Click “Click to add option” to add a new scale option.
- Add multiple options by selecting the next to the “Options Header” and rename each scale option as necessary.
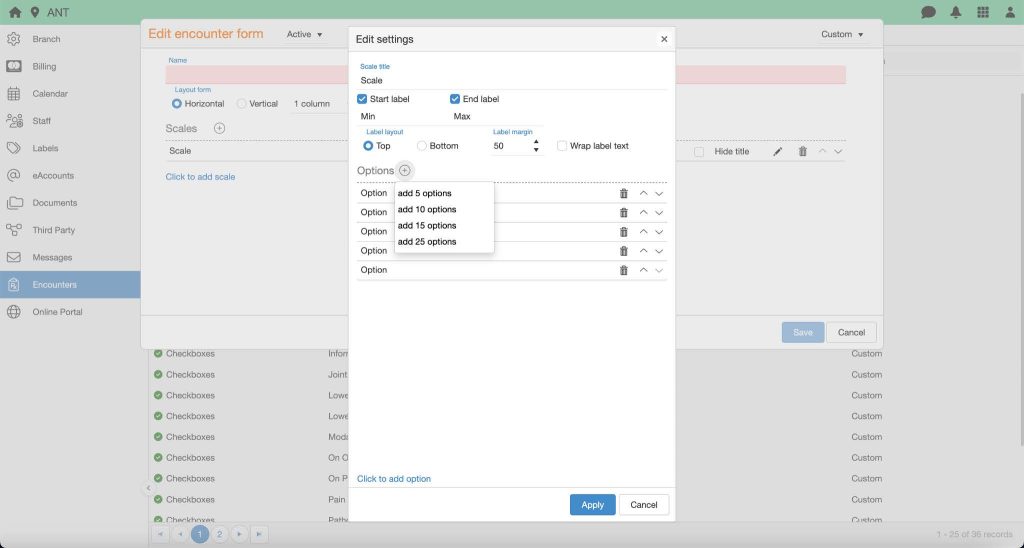
- Customize Scale Options
- Hide the title for options if desired.
- Use the Edit icon to adjust existing scale options.
- Set Start and End labels for the scale.
- Choose to display labels above or below the scale options.
- Adjust the Label Margin (the distance between the label and the scale’s radio button).
- Enable text wrapping for longer labels.
5. Creating a New Encounter Note Using Encounter Forms
To create a new encounter note with encounter forms:
- Navigate to the Encounter Tab
- Go to Branch > Encounters > Encounters Tab.
- Add Encounter Form
- Select the Add Encounter Form


 icon.
icon. - Choose the desired encounter form and click Apply.
- Select the Add Encounter Form

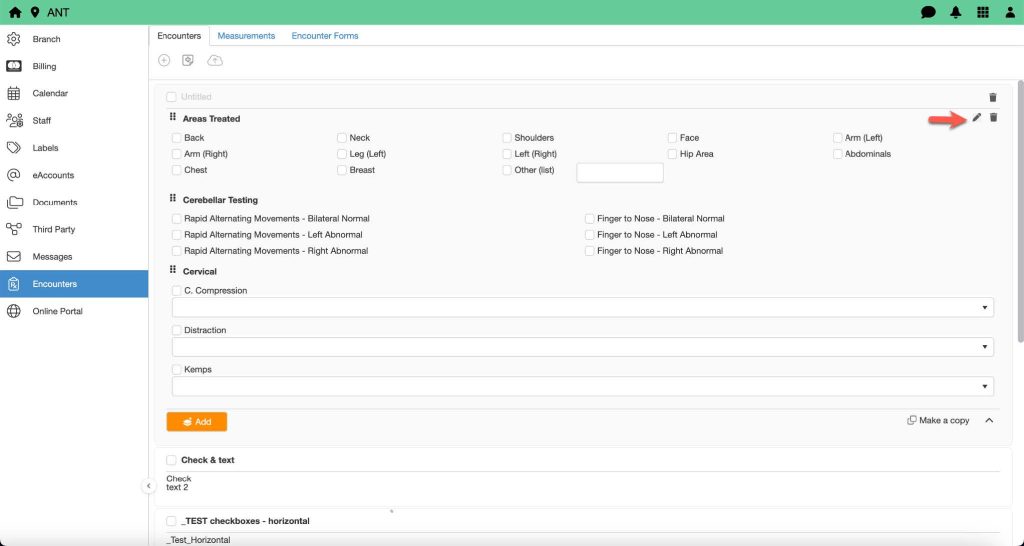
- Edit Forms on the Fly
- After applying the form, click Edit to make adjustments as needed during the encounter.
- You can continue adding more forms, sections, or diagrams as necessary.
- After applying the form, click Edit
6. Applying Checkboxes, Text Fields, and Scales to Existing Encounter Templates
Once you’ve created your encounter forms, you can apply them to your EMR templates:
- Select the Encounter Form
- In the Encounter Form list, check the box next to the encounter note you wish to apply.
- Add Encounter Forms
- Click on the Add Encounter Form icon.
- Choose the appropriate form and click Apply.
- You can continue to edit forms as needed for each encounter.
- Click on the Add Encounter Form

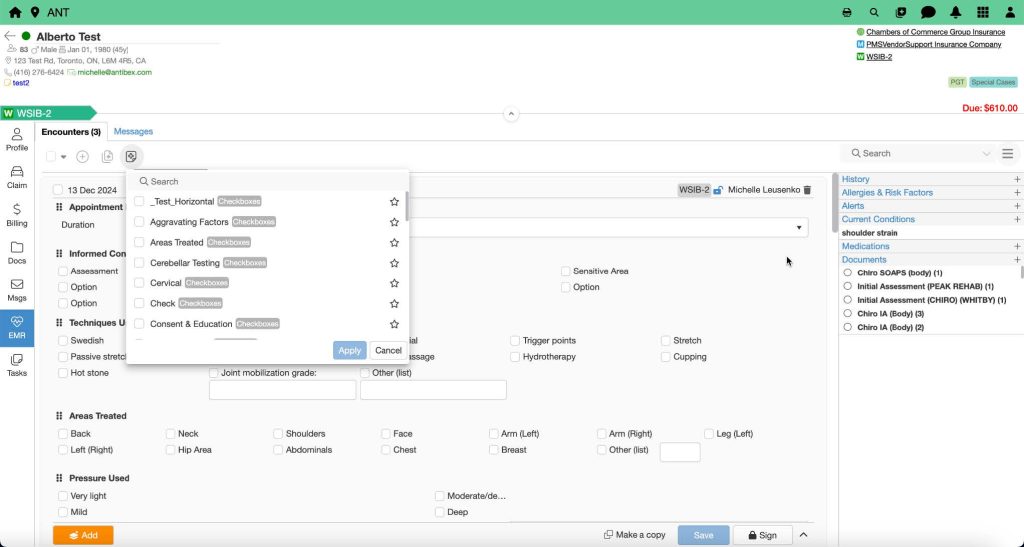
7. Applying Encounter Forms to Patient Encounter Notes (Not From a Template)
To apply encounter forms to a patient’s encounter notes:
- Select the Encounter Note
- Check the box next to the encounter note you want to apply.
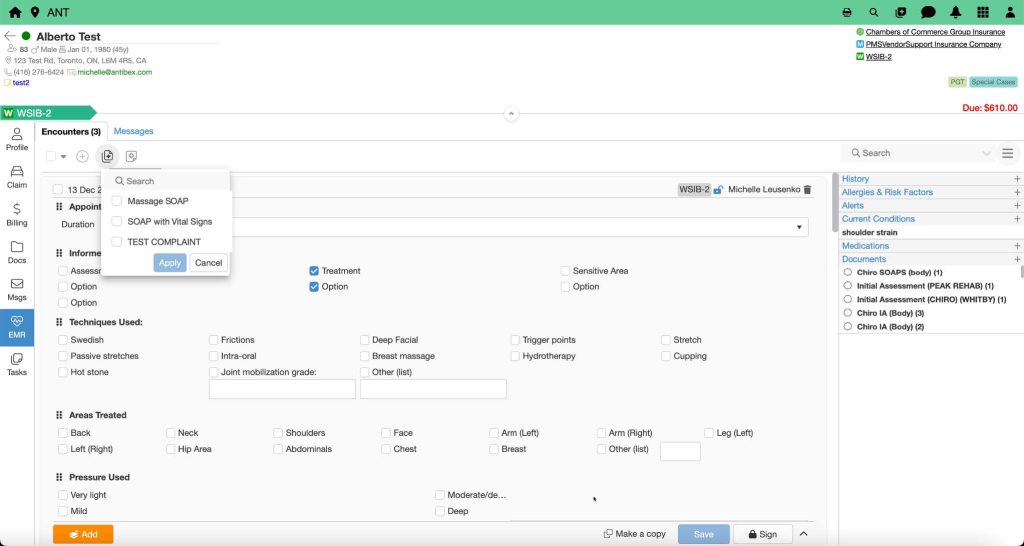
- Add encounter Forms Manually
- Click on the Add encounter Form


 icon within the encounter note.
 - Select the desired encounter form and click Apply.
- Edit the form as necessary to customize it for the current encounter.
- Click on the Add encounter Form
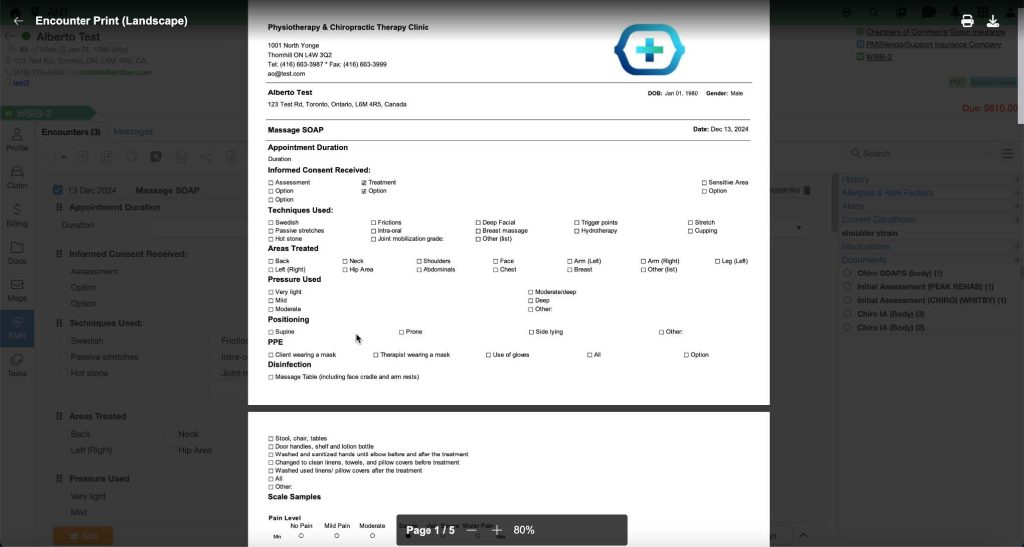
8. EMR Printout Options
When generating reports or printouts from your EMR system, you can choose between:
- Portrait: Standard orientation.

- Landscape: Ideal for wider reports or forms, and some printouts may be easier to read in landscape orientation.