This guide outlines the process of adding new Provider’s to your staff list and inviting them to the branch so they can access the program.
Step 1: Create a Provider
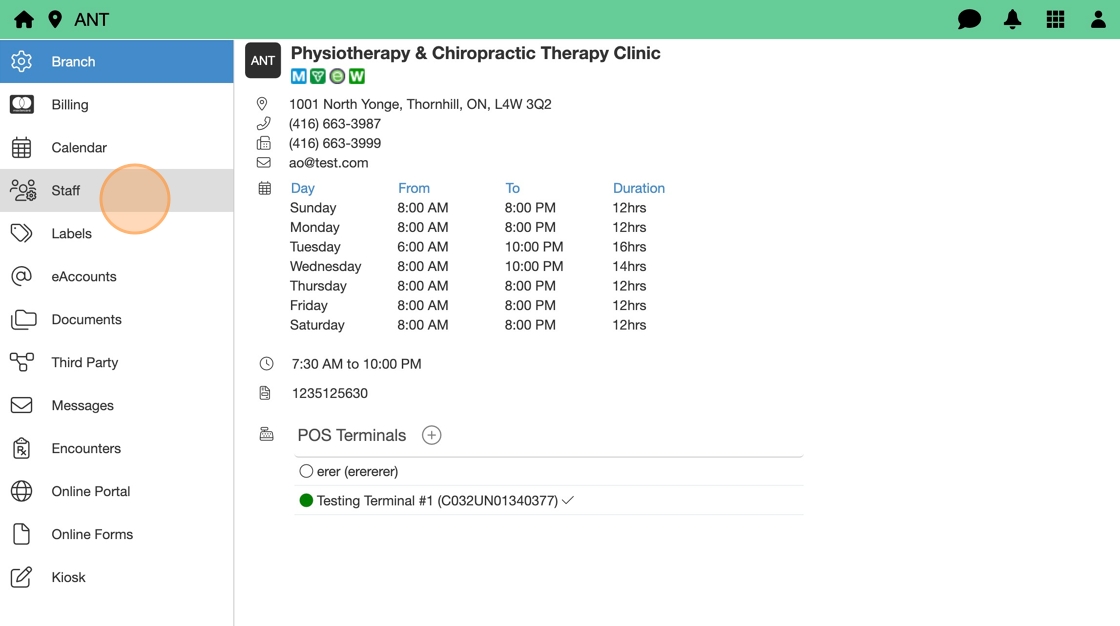
1. Go to Branch App.
2. Select Staff tab.
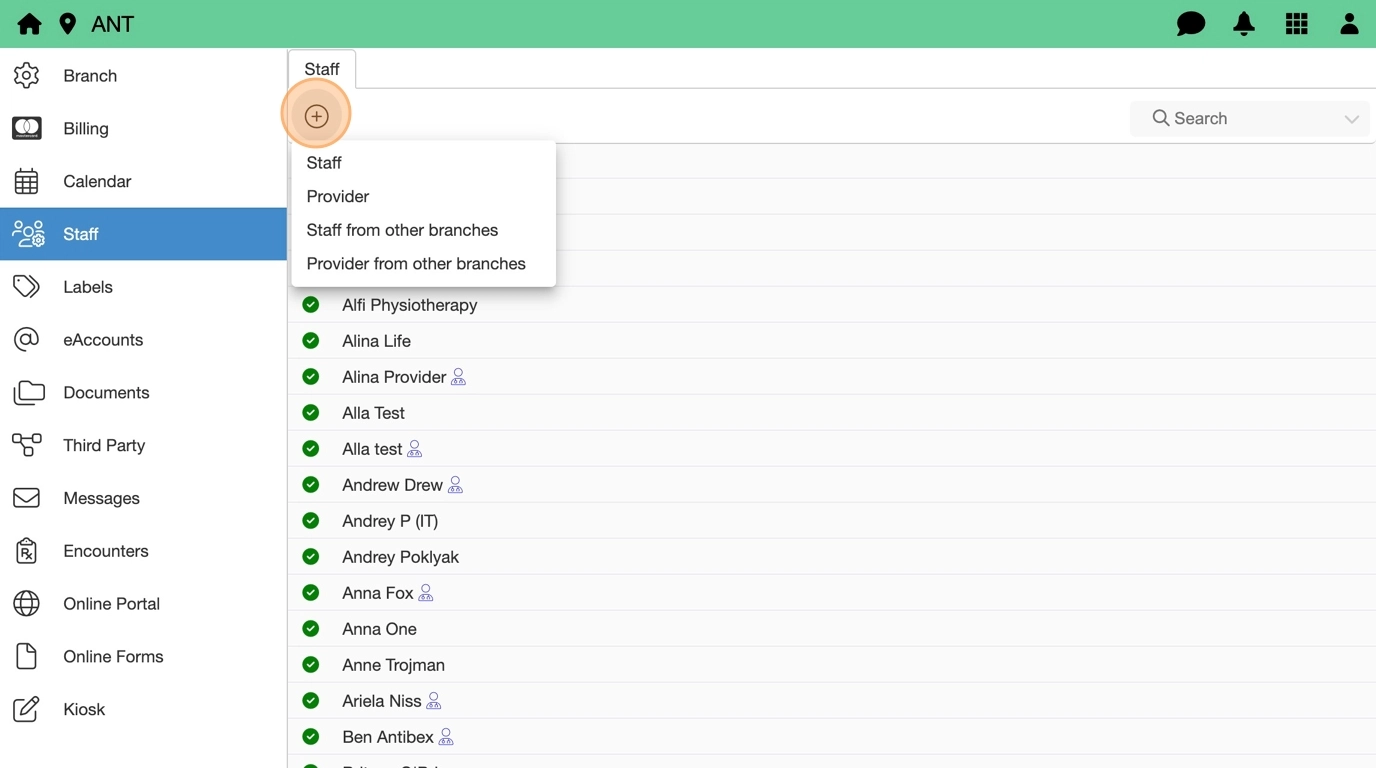
3. Click Add (+) and select Provider.
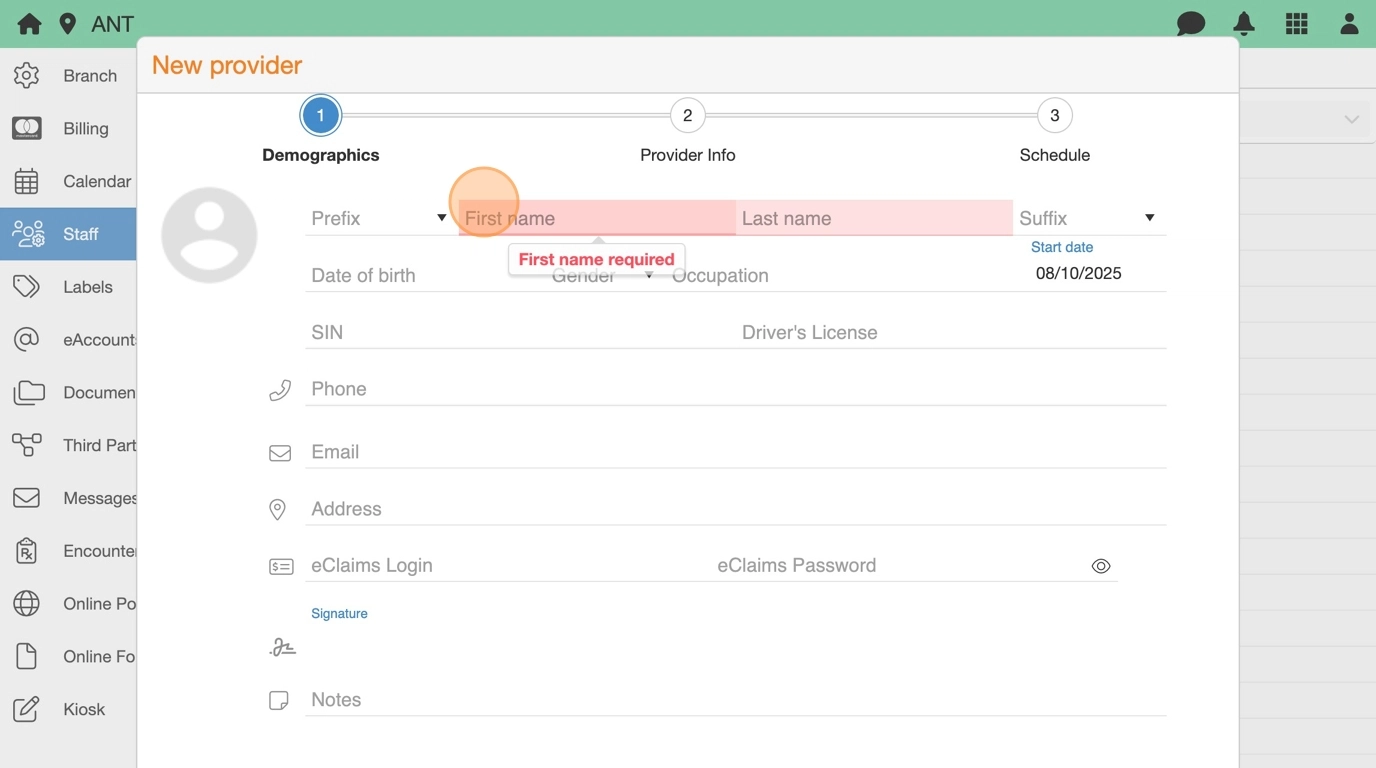
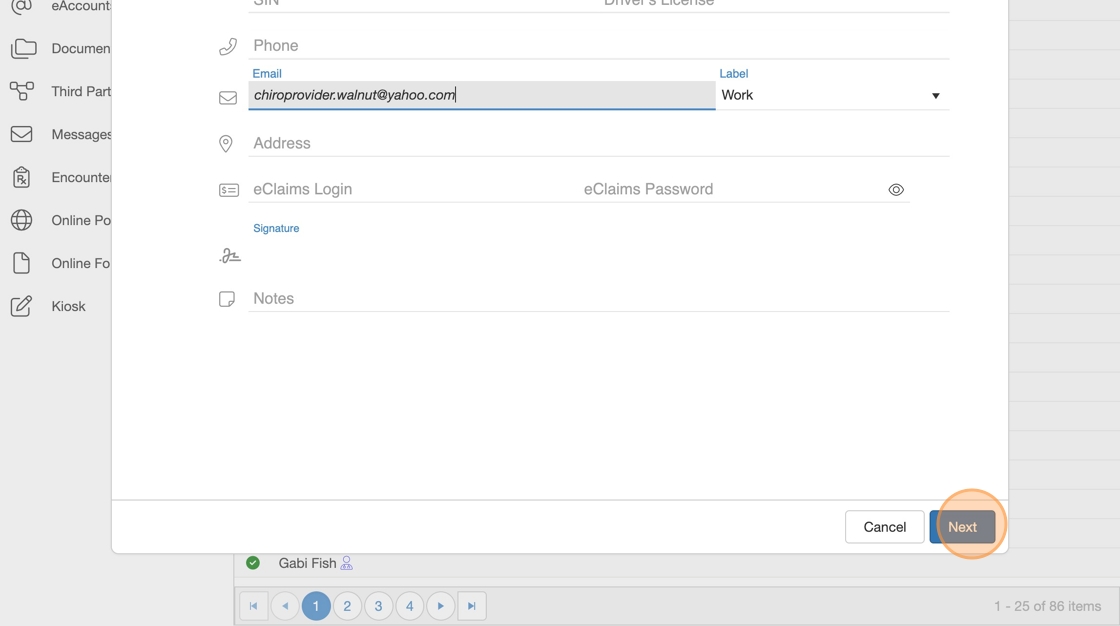
4. Add required Demographics information:
- First Name
- Last Name
- Email Address
5. Click Next.
6. Add Provider’s professional credentials:
- Specialty
- Registration Number
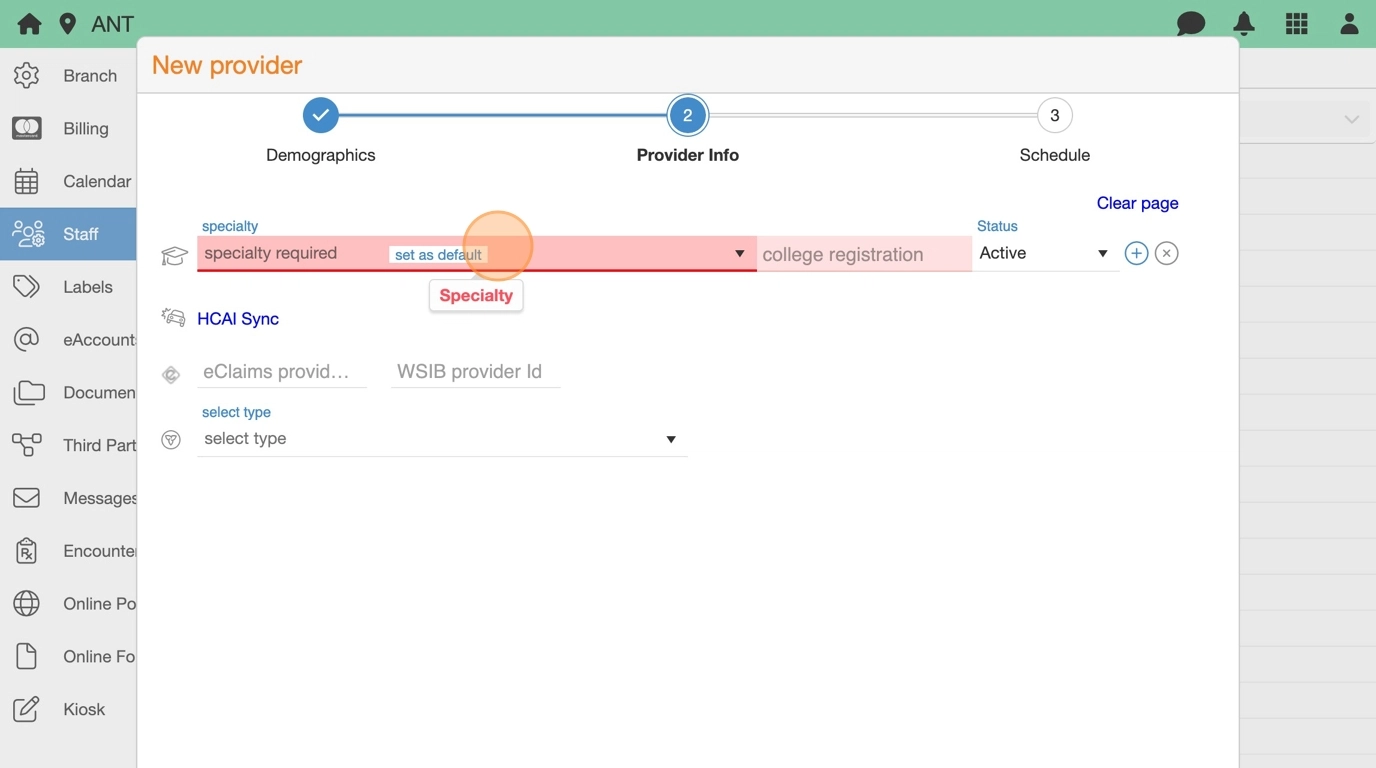
7. Click Next.

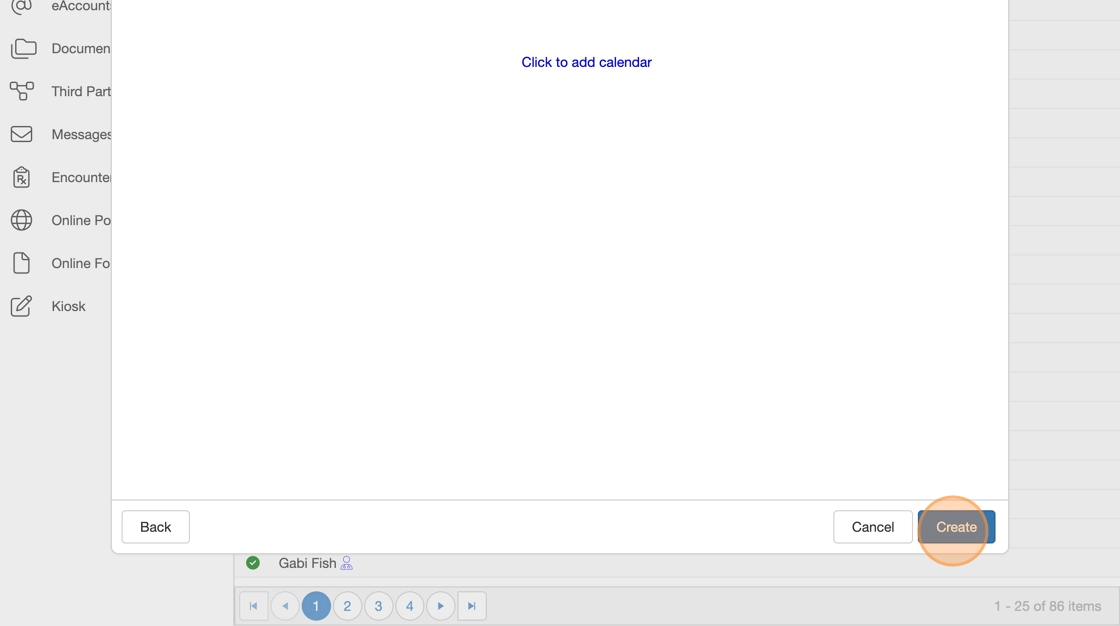
8. Create a Provider schedule now or later:
- Connect now using Click to add calendar.
- Or configure later by referring to Calendar Setup Guide.

9. Click Create.
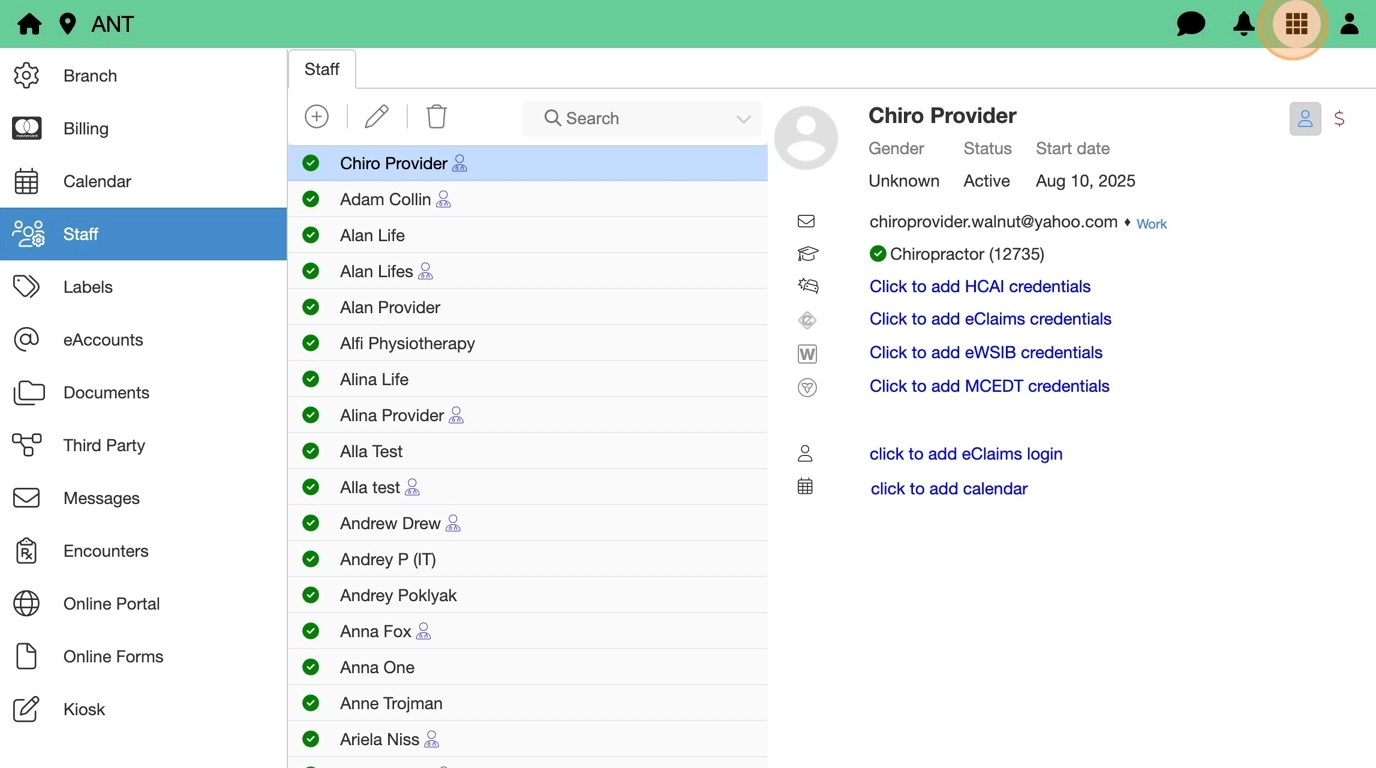
10. Provider is now added to staff list.

Step 2: Invite the Provider
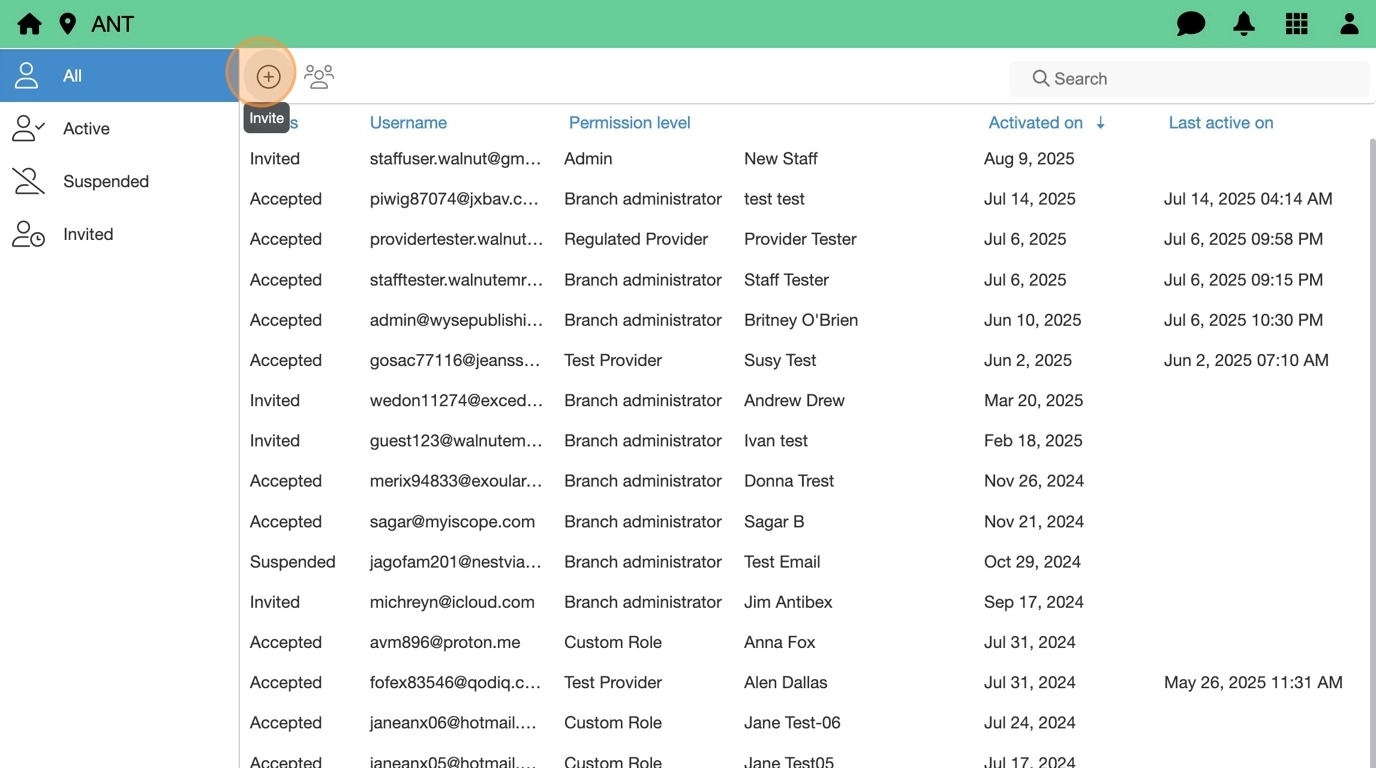
11. Go to Users App.
12. Click Add (+) and select Staff member.
13. Verify email address is entered correctly.
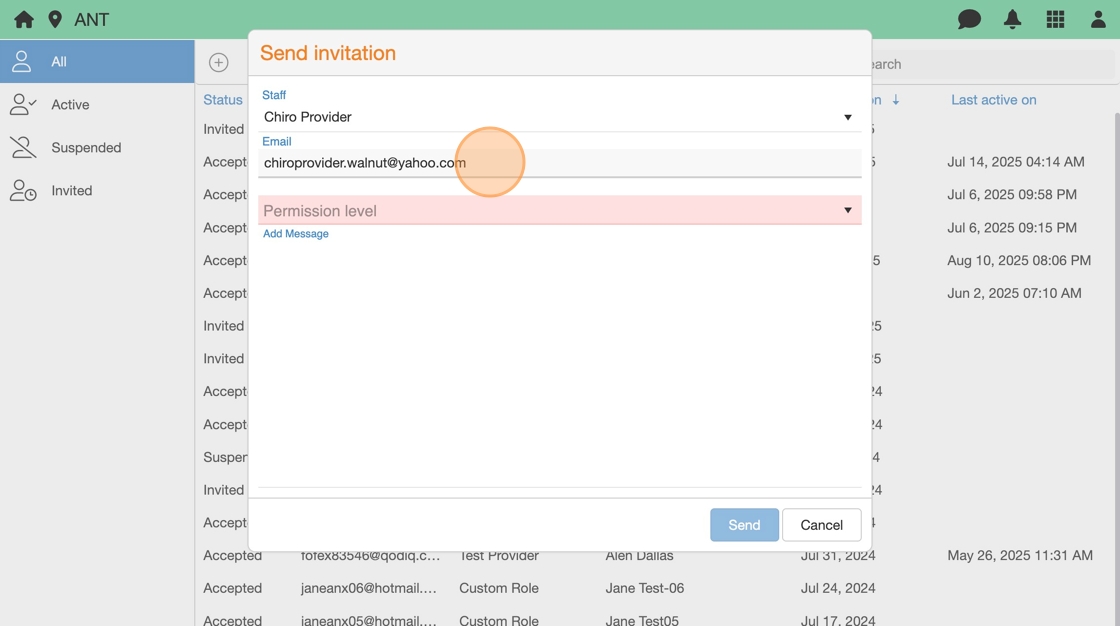
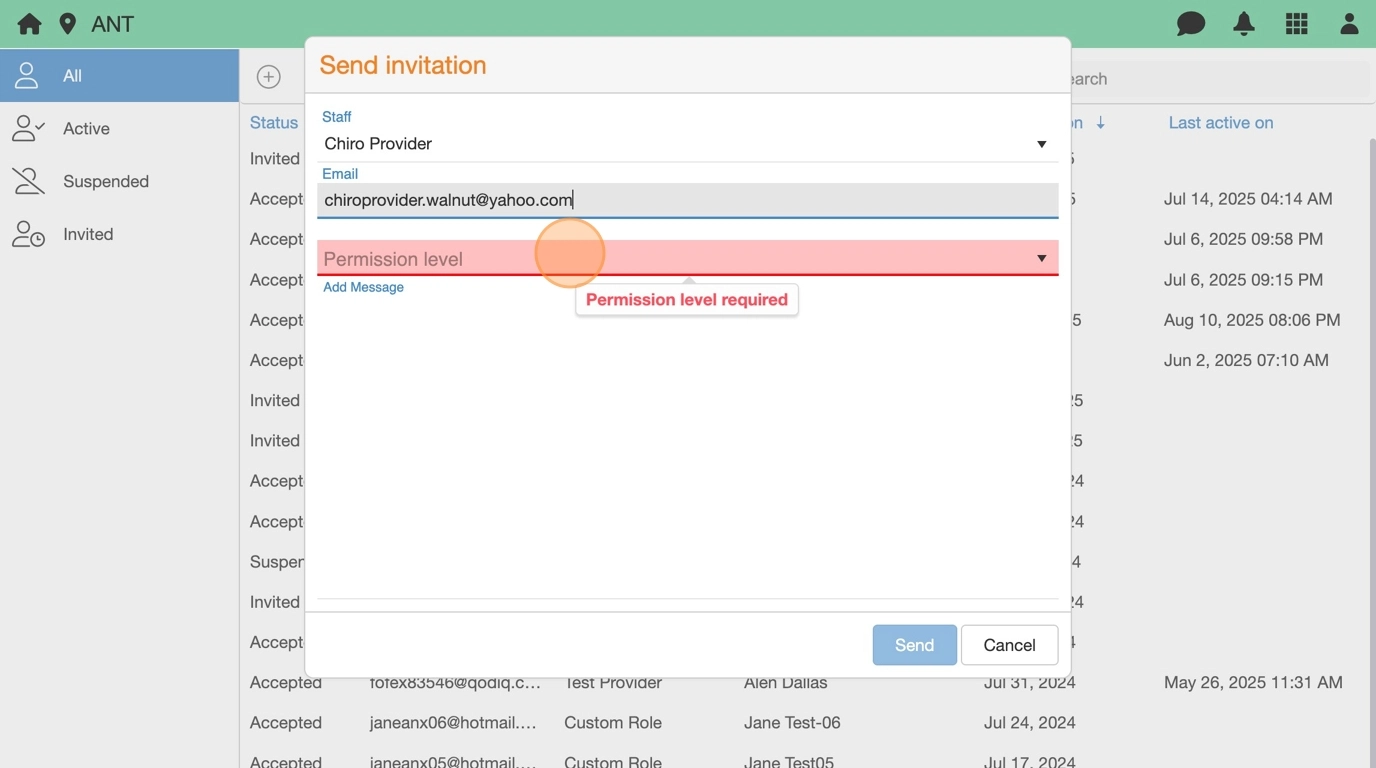
14. Select a Permission Level (e.g., Provider).
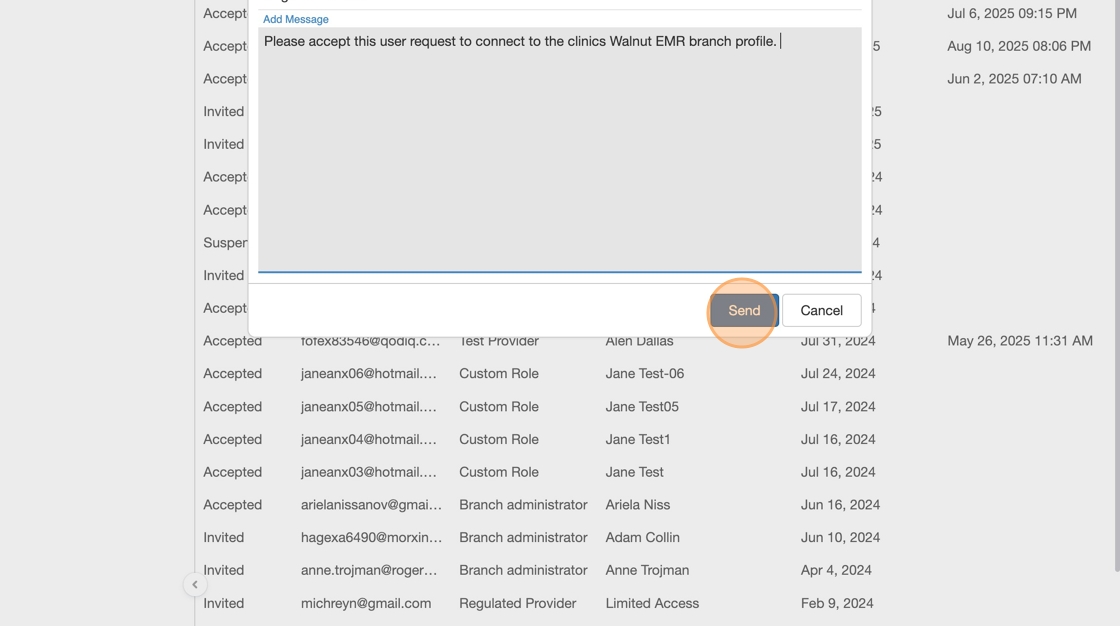
15. (Optional) Add a message to invitation email.
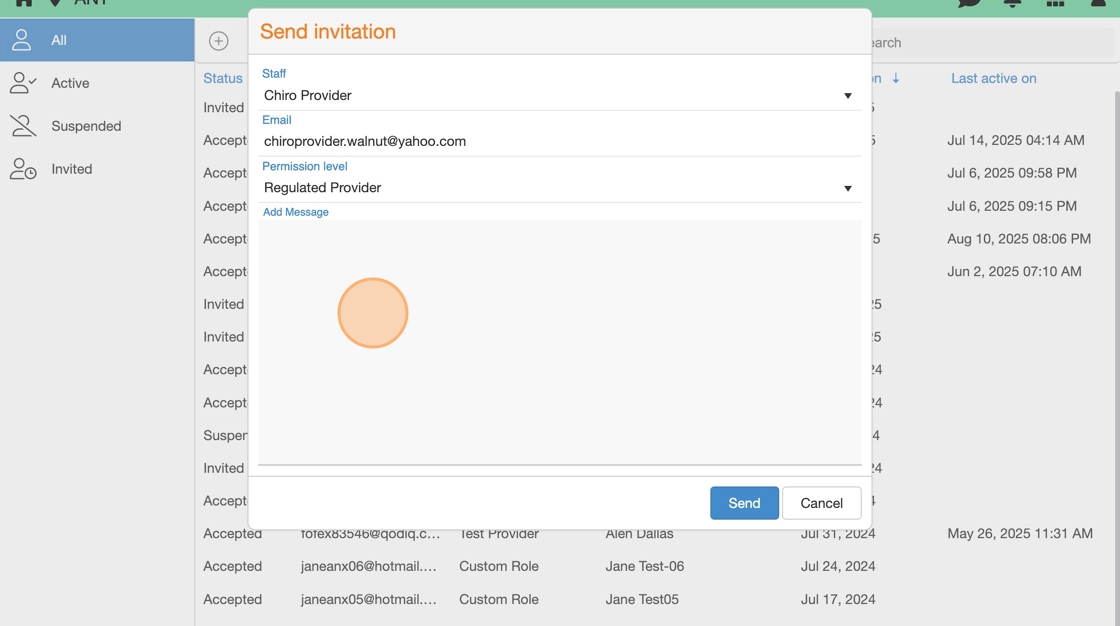
16. Click Send.