WalnutEMR allows you to connect multiple clinics under a shared URL and assign staff across branches. Providers can maintain a single login to work at multiple branches.
Step 1: Import an Existing Provider
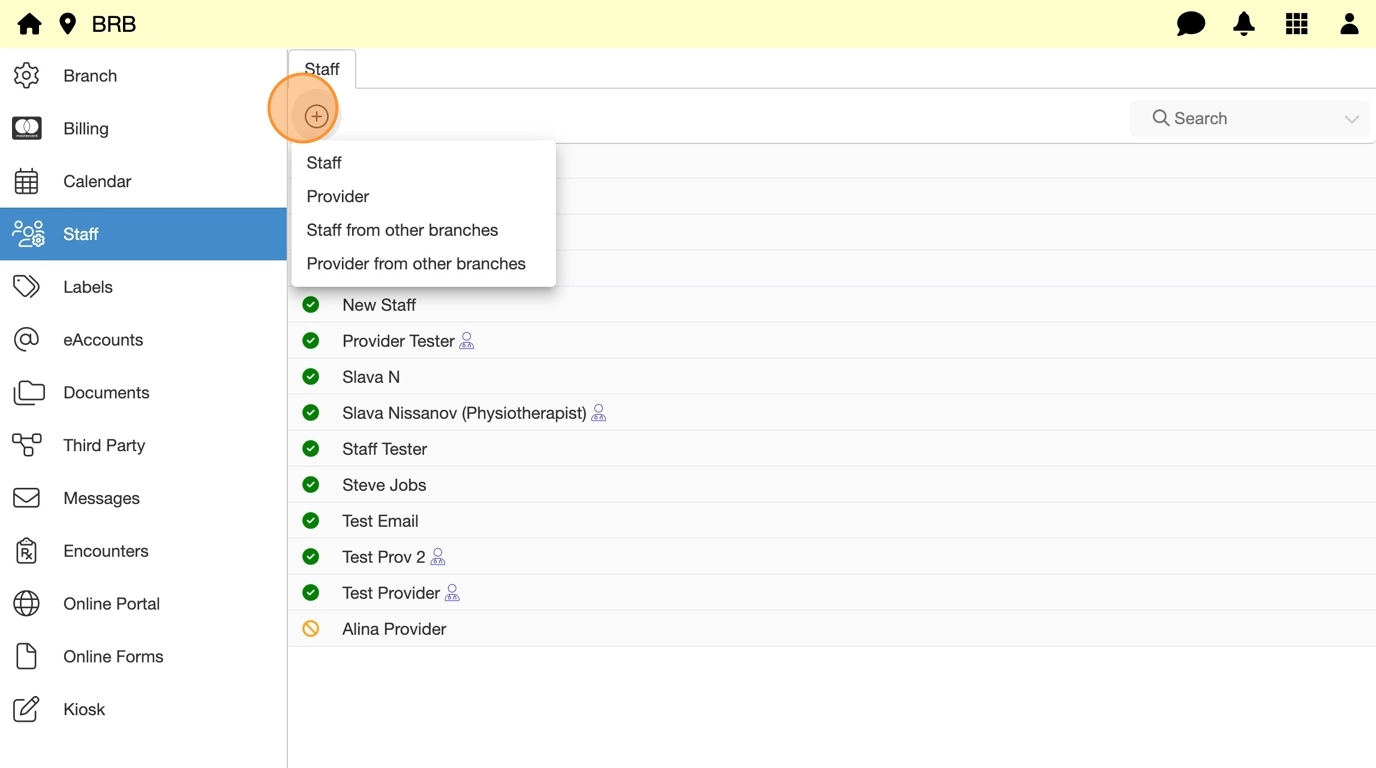
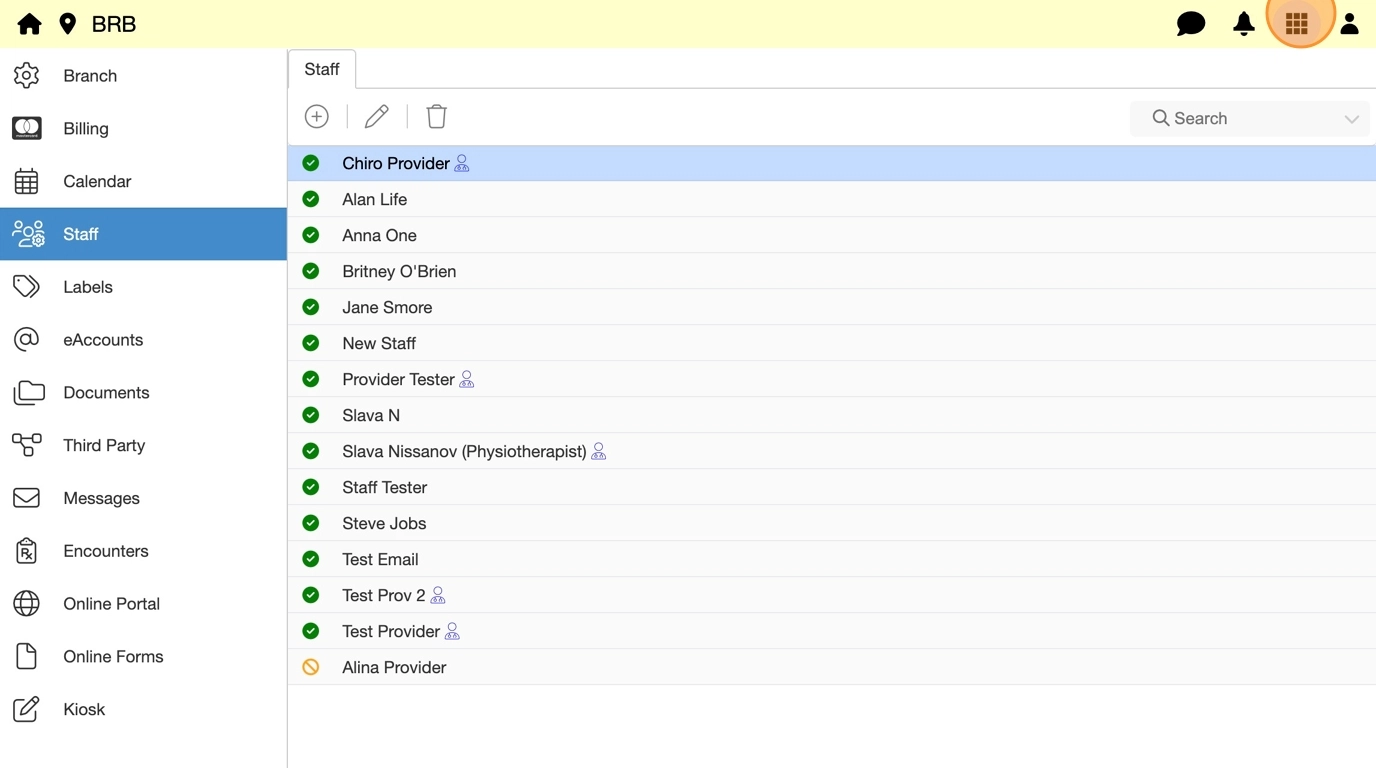
1. Go to Branch App.
2. Select Staff tab.

3. Click Add (+) and select Provider from other branches.
4. Select Provider from list of connected clinics.
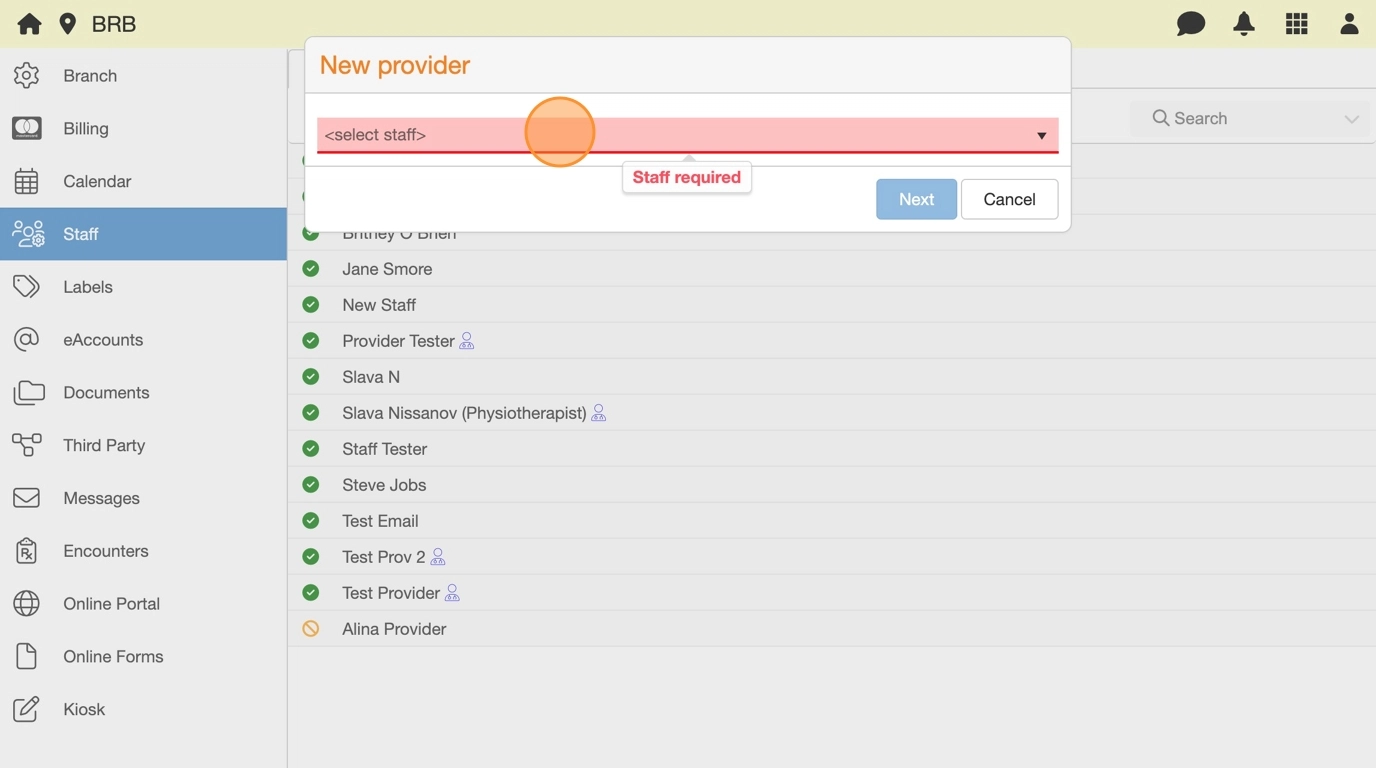
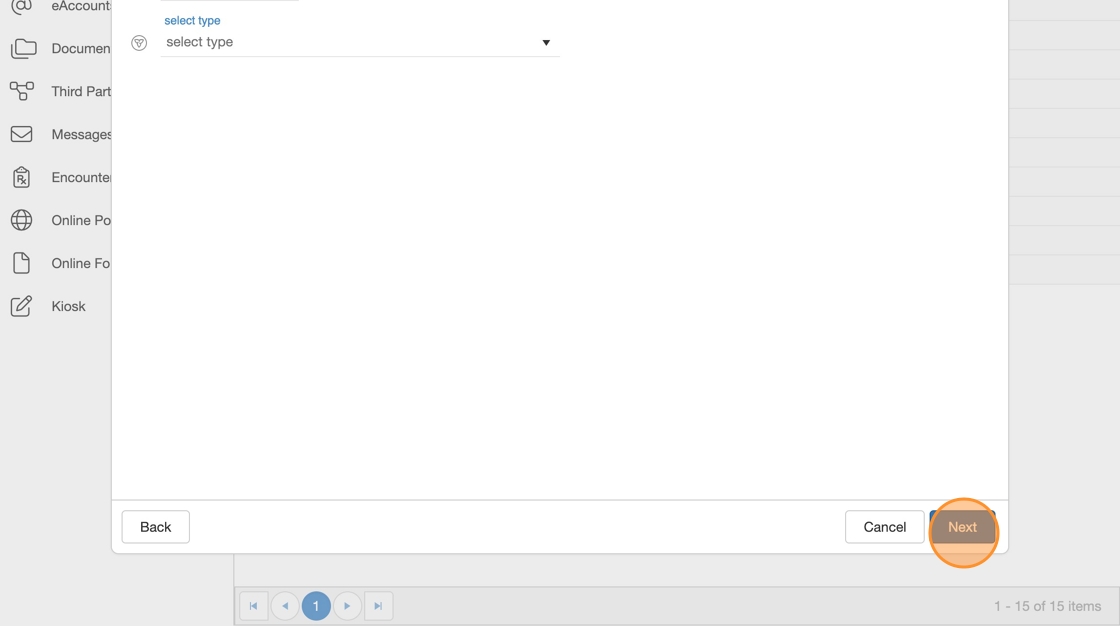
5. Click Next to auto-fill existing Provider details to new Branch.

6. Verify or update Demographics details (only name and email are required).
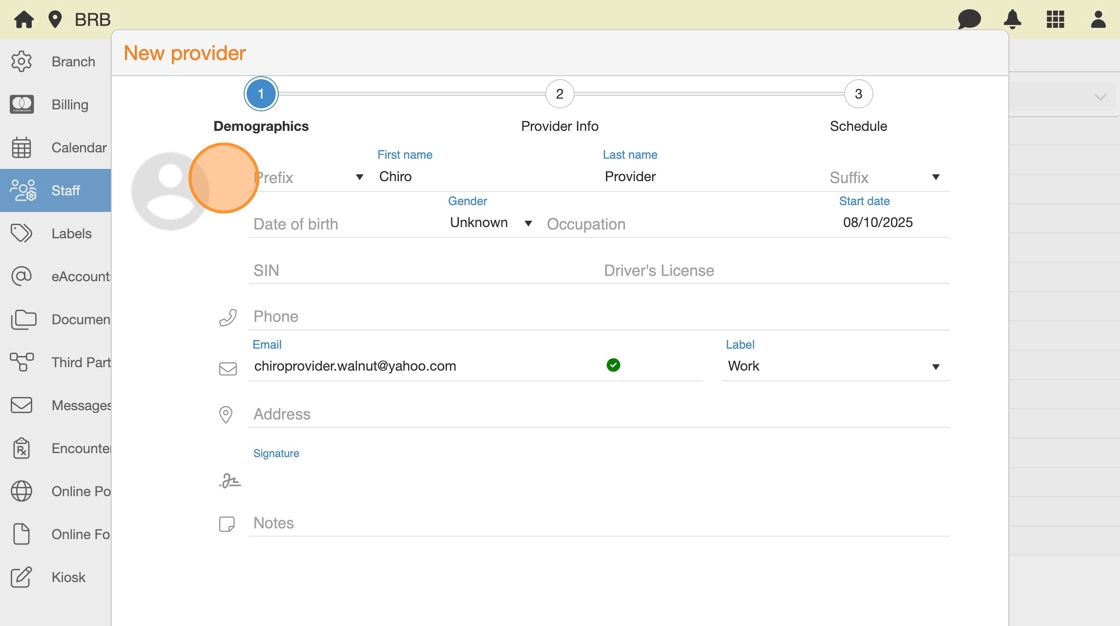
7. Click Next.

8. Add or update clinic specific Provider Info (only specialty and college registration are required).

9. Click Next.
10. Create a new Provider schedule now or later:
- Connect now using “Click to add calendar”.
- Or configure later by referring to Calendar Setup Guide.

11. Click Create.

Tip: The Provider is now added to the second Branch as a staff member. You can return and update the Provider’sprofile at any time by clicking on their name on the Staff List.
Step 2: Invite the Provider
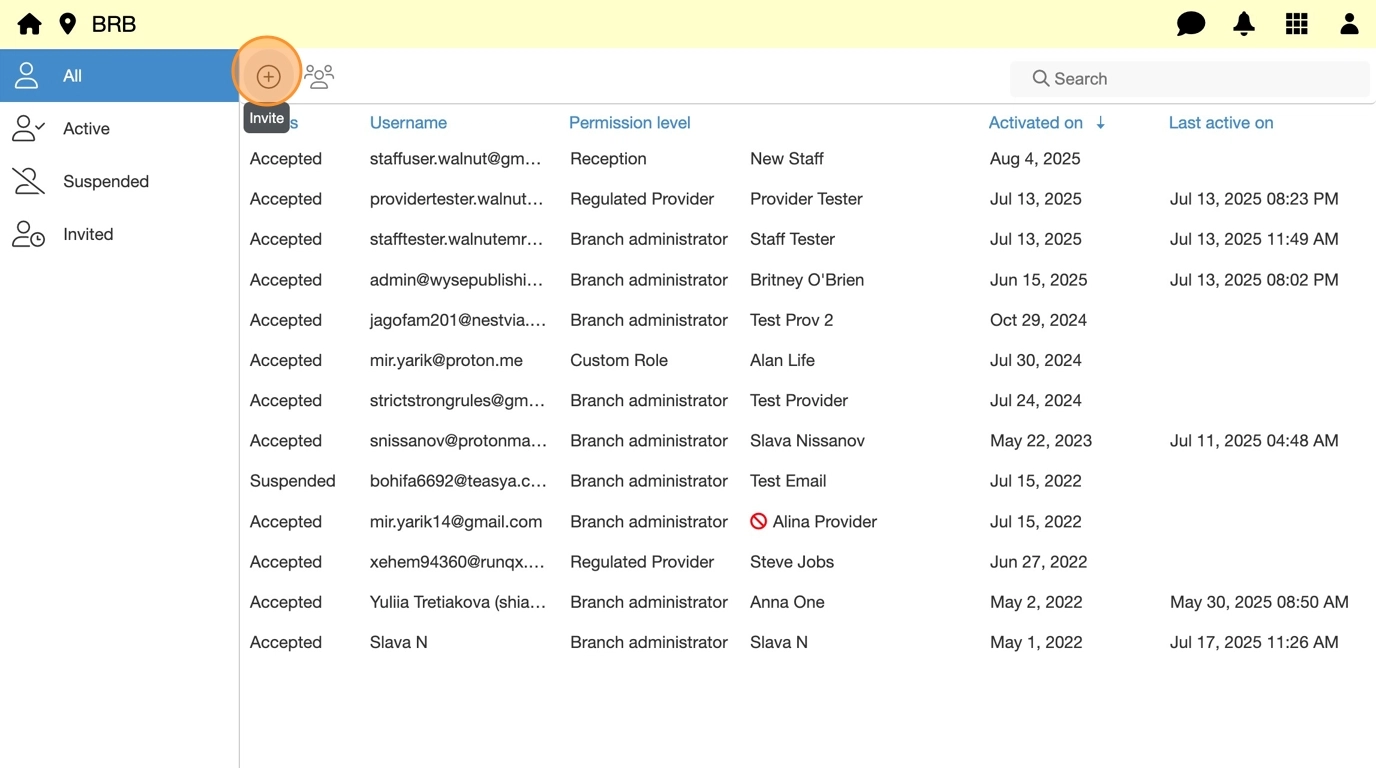
12. Go to Users App.
13. Click Add (+) and select Staff member.
14. Verify email address is entered correctly.

15. Select a Permission Level (e.g., Provider).
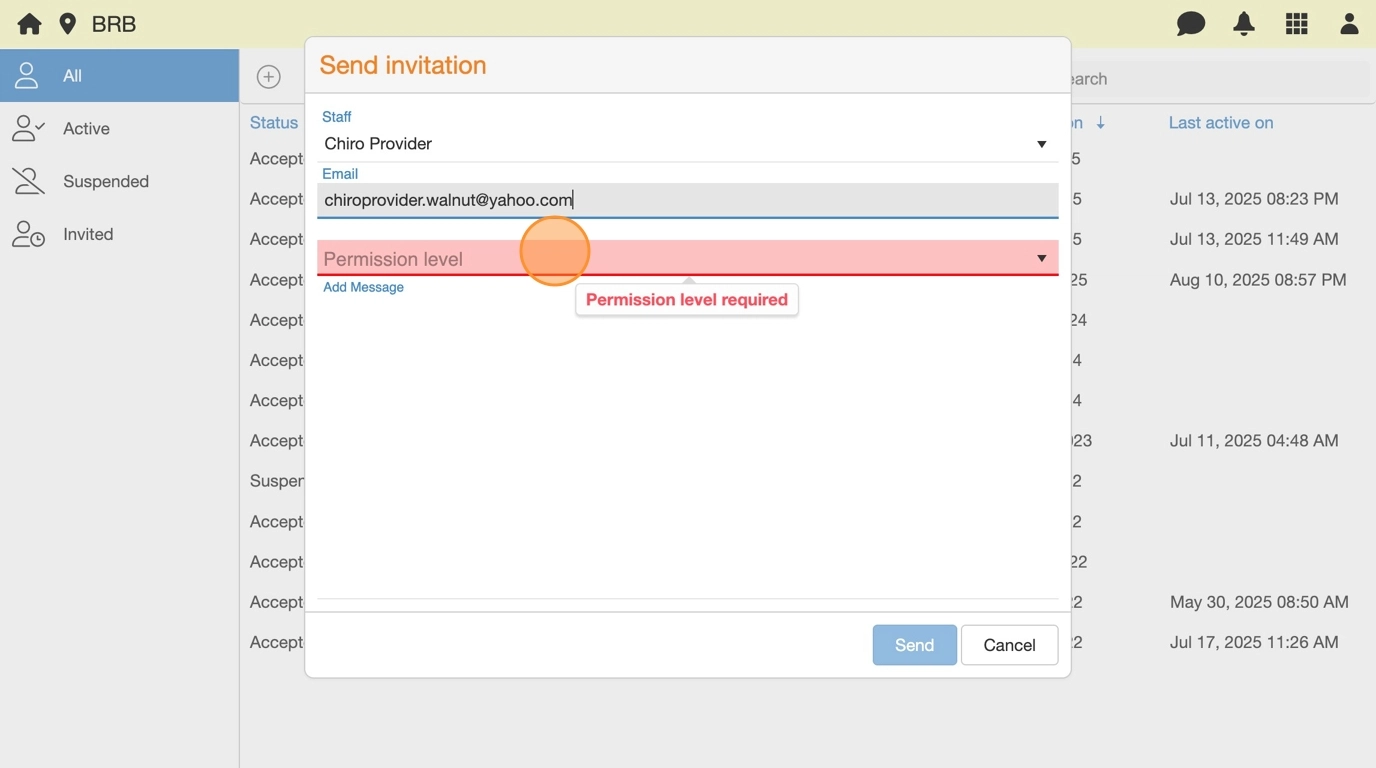
16. (Optional) Add a message to invitation email.

17. Click Send.
