Click on the Waitlist icon from the Calendar App menu header.
The Waitlist Manager will open as a popup.
Viewing the Waitlist
Use the available filters to refine your search:
Filter by one or more specific calendars
Filter by one or more specific appointment reasons
Filter by one or more specific patients
Filter by status
Book Now – An appointment slot has become available, and the patient can be scheduled.
Waitlisted – No appointment slots are available yet, and the patient remains waitlisted.
Not Available – The calendar is either unavailable at this time or the maximum number of appointment overlaps has been reached.
Viewing Past Waitlist Appointments That Were Not Scheduled
Past Waitlist – Deselect the checkbox to hide the past waitlist. Doing so lists patients who were on the waitlist but were never scheduled.
Managing the Waitlist
A Calendar Icon Indicator is displayed before the date column in the waitlist list:
Green – Book Now: A slot is available; click the button to schedule the appointment.
Orange – Waitlisted: No slots are available, and the patient remains on the waitlist.
Red – Not Available: No slots are available due to an unavailable calendar or maximum appointment overlap.
Click the icon to modify waitlist appointment reasons or times.
To add a patient to the waitlist:
Click the button in the Waitlist Manager.
Select the patient name.
Select Claim if applicable.
Choose a calendar (or multiple calendars).
Select an appointment reason (or multiple reasons).
Set the Available From and Available Until times.
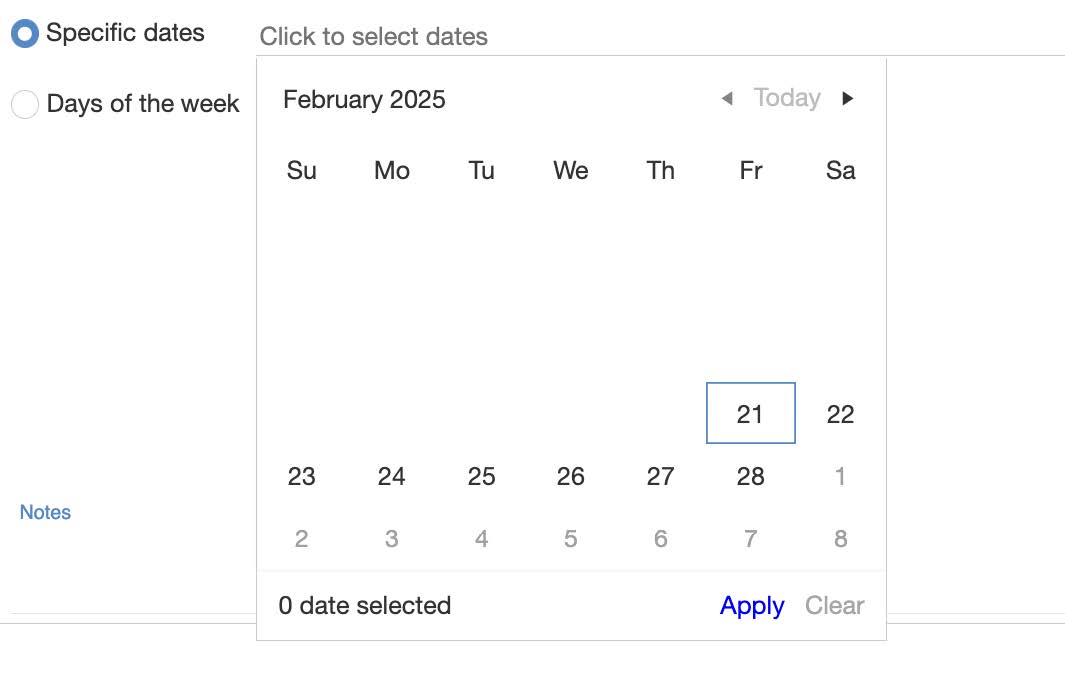
Choose either specific days or days of the week:
Specific Dates – Select exact dates for availability and click Apply.
Days of the Week – Choose recurring days (Monday-Sunday) and define an end date if applicable.
Alternatively, click the three-dotted button next to the provider’s name in the calendar and select Add to Waitlist, then follow the same process above.
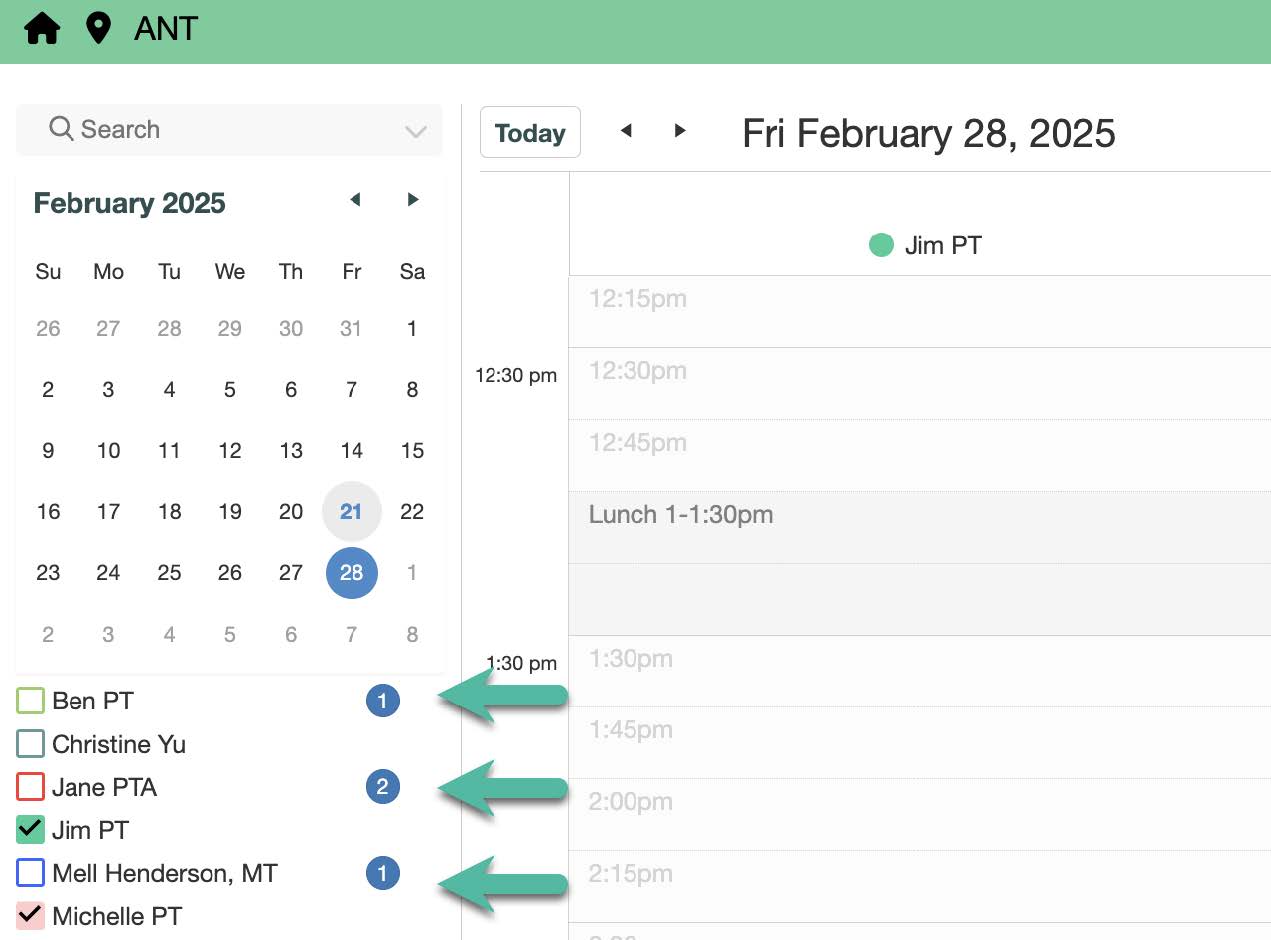
The number displayed next to the provider’s name in the calendar selection area of the Calendar App shows the current number of patients on the waitlist for that provider, based on the selected view (day, week, or month). Clicking on this number will open the waitlist filtered by the selected provider.
Booking from the Waitlist
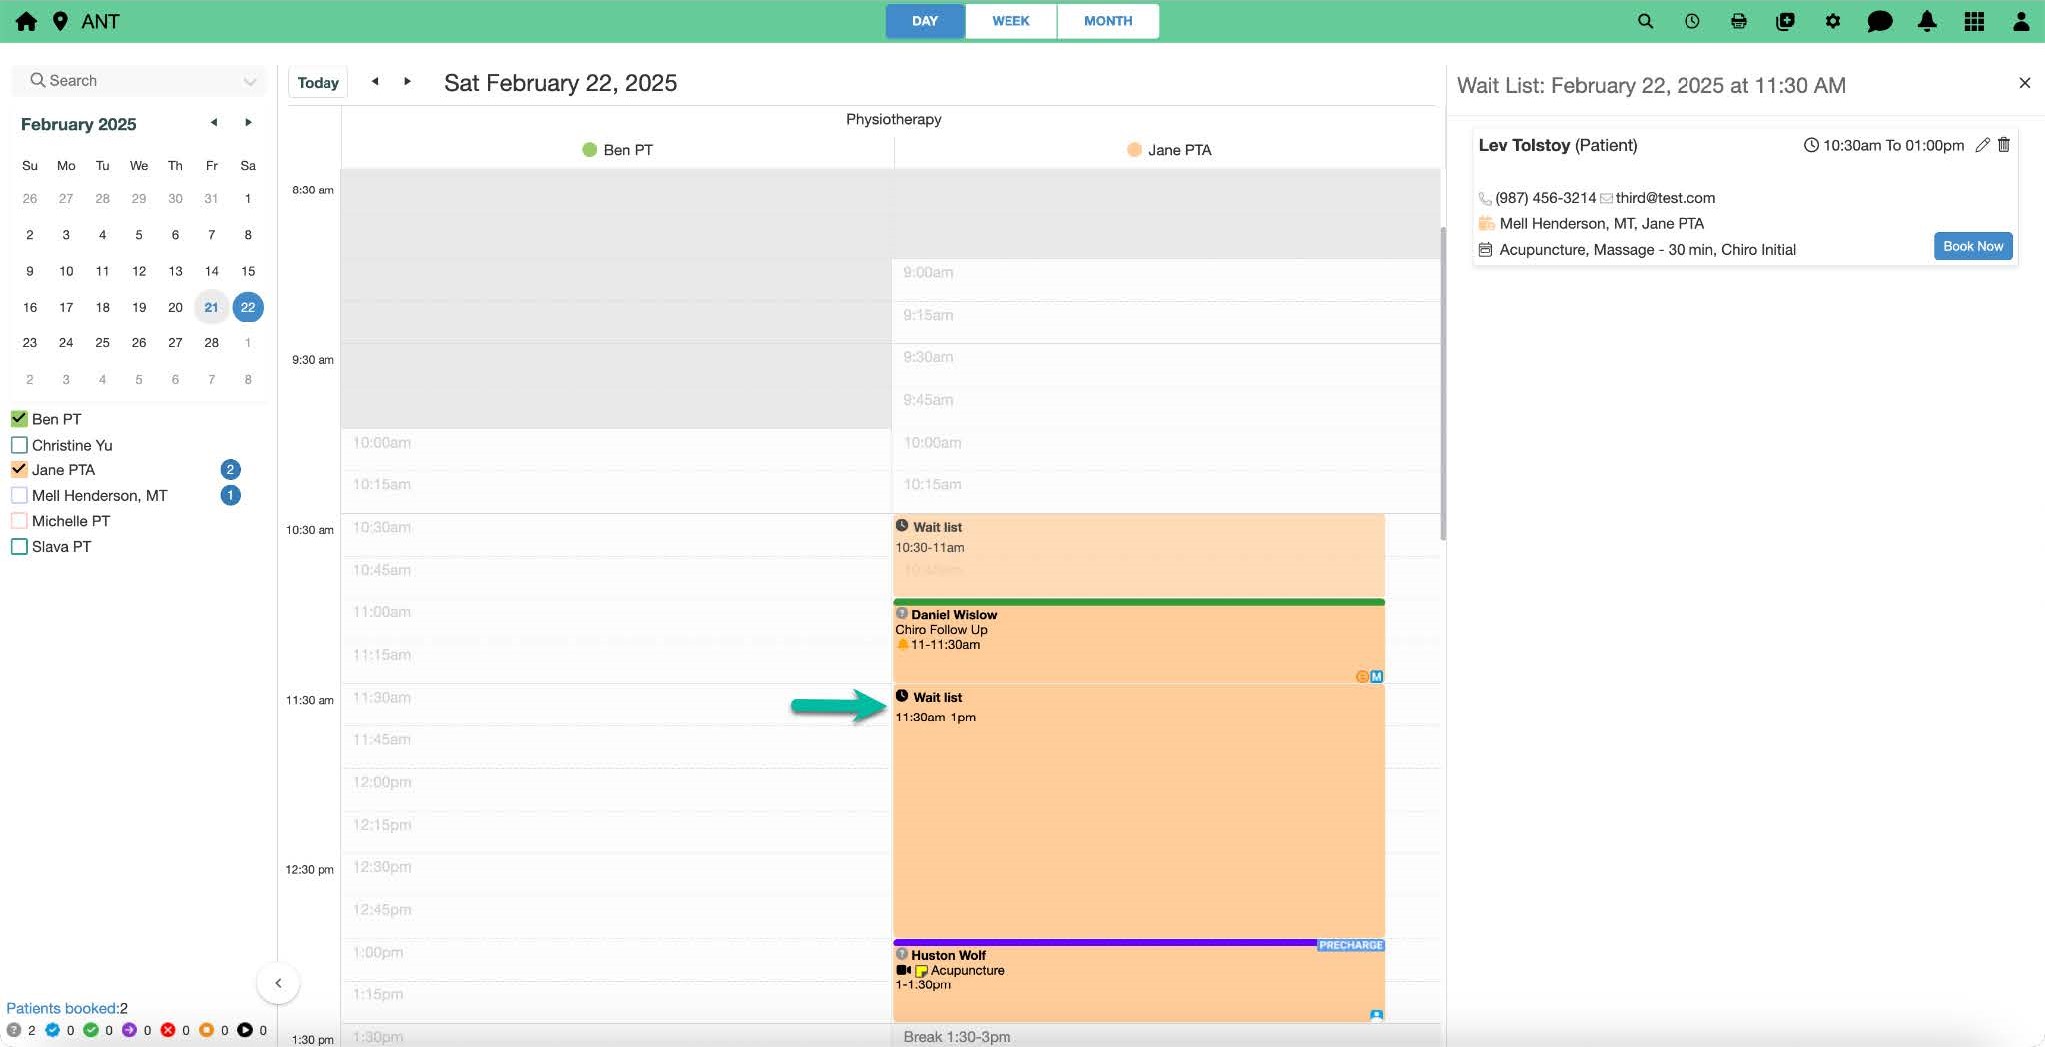
When a calendar spot becomes available, an appointment slot labeled Waitlist will appear.
Clicking on the Waitlist slot opens a right-hand panel, showing:
Current waitlist details for that slot.
Patients waiting for that slot.
Patient demographic information.
Click the icon to edit details if necessary
Click the button to schedule the appointment.
Clicking:
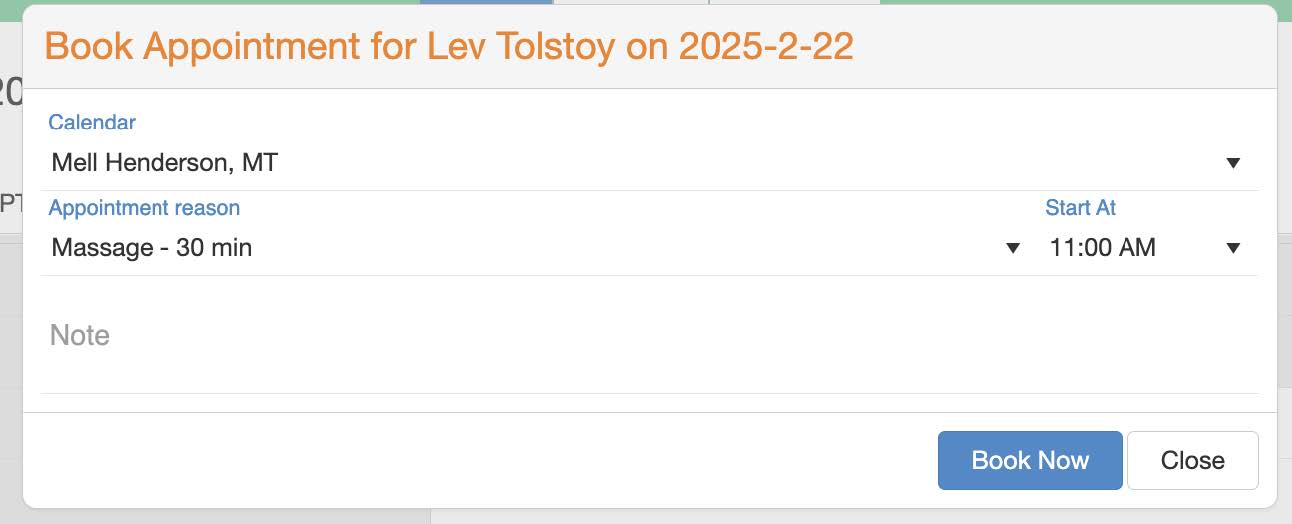
Will schedule the appointment immediately unless additional details (such as multiple calendars, appointment reasons, or available appointment times) require further input.
If additional details are needed, a new screen will open to confirm booking details.
Clicking on the confirmation screen will finalize and schedule the appointment.
Users can add a note, which will be saved as an appointment note.
Waitlist icon from the
Calendar App menu header.

Book Now – An appointment slot has become available, and the patient can be scheduled.
Waitlisted – No appointment slots are available yet, and the patient remains waitlisted.
Not Available – The calendar is either unavailable at this time or the maximum number of appointment overlaps has been reached.
Past Waitlist – Deselect the checkbox to hide the past waitlist. Doing so lists patients who were on the waitlist but were never scheduled.
button to schedule the appointment.
icon to modify waitlist appointment reasons or times.